In a self-converted van the most expensive thing you own is not the fridge, the battery or the bed. It is the volume, because you cannot buy more of it and every litre given to storage is a litre taken from living. That single fact changes the whole specification: bags for a van conversion are not judged on how waterproof they are, they are judged on whether they fit a specific aperture, whether they can be compressed to nothing when half empty, whether they survive being shaken for ten thousand kilometres, and whether they stop damp kit from turning a nine-square-metre cabin into a mould farm. Nothing in a van immerses a bag, ever.
This guide covers the load cases in the order they actually destroy product: interior heat cycling that runs to sixty or seventy degrees Celsius in summer and near freezing overnight, mildew from wet gear in a sealed small volume, vibration fatigue at fixing points you drilled yourself, vertical space and how to build a hang point that survives corrugations, millimetre-level dimensional customisation, where water in a van really comes from, modular nesting sets, closure choice under dust and cold, the electrical bay, payload arithmetic, a five-format system matrix, and how a brand should structure a van life programme. QUANZHOU JUNYUAN BAGS: custom waterproof bag production since 2014, 4,950 m² SGS-verified facility, MOQ 500 pieces per style, sampling in 6–10 working days and bulk in 35–50 days, FOB Xiamen.

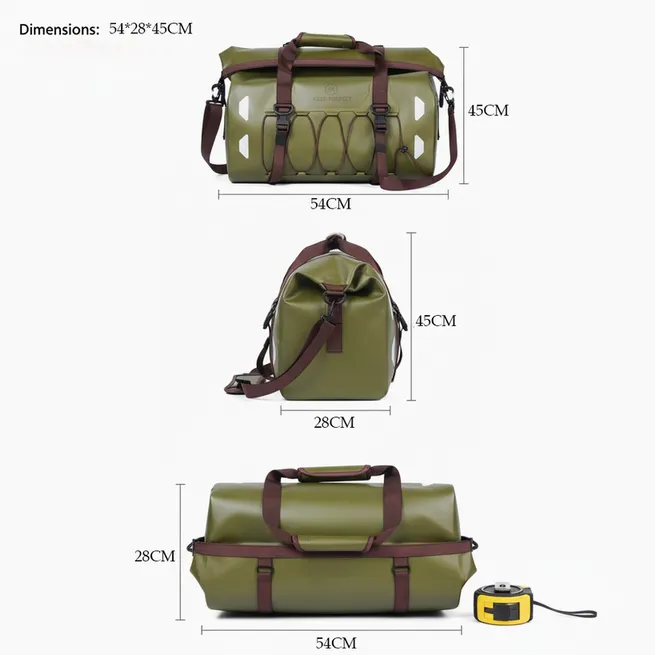
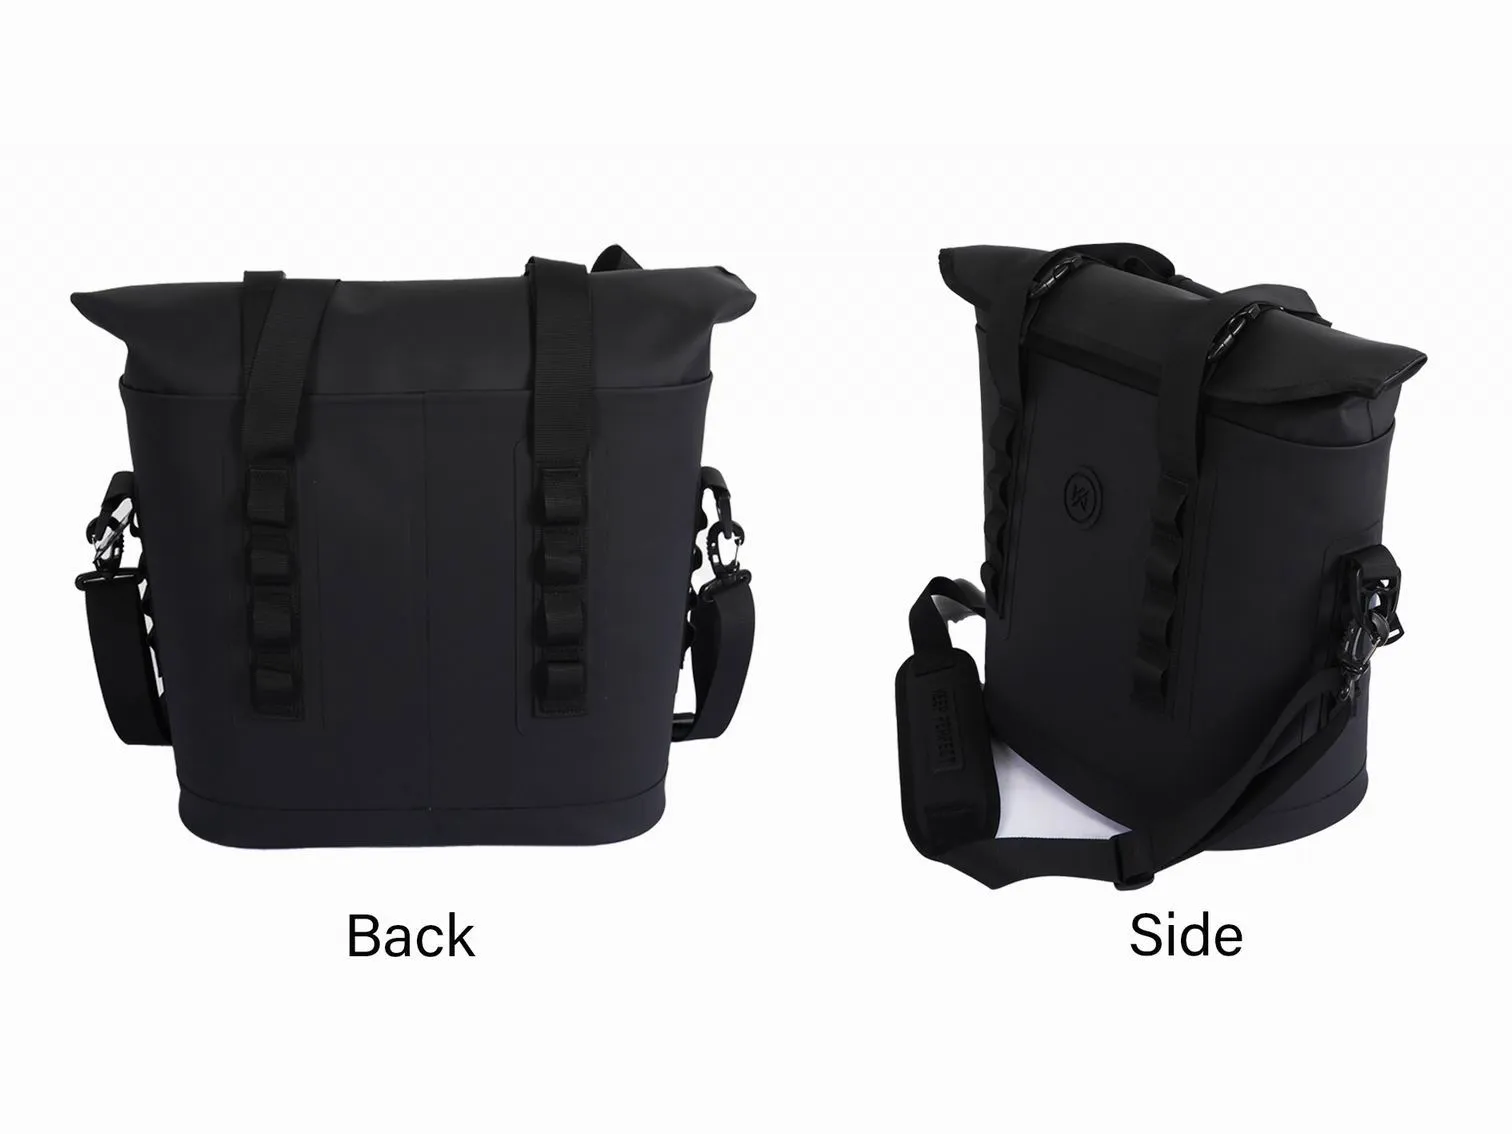
A self-built van is a different product brief from a factory camper
The van life customer is not buying a vehicle accessory, they are buying a fitting for a cavity they made themselves. That is the distinction that separates this page from our guide to factory motorhome and camper road trips. A production camper arrives with lockers of known dimension, a sealed external bay, a manufacturer who has already thought about ventilation and a warranty. A self-build arrives as a bare metal box with wheel arches, ribs and a floor the owner insulated themselves, and every storage solution in it is a one-off decision made with a jigsaw. So van life storage bags are specified against a drawing rather than a catalogue, and the brands that win here are the ones willing to make three heights of the same body rather than one.
Treating campervan conversion organisation as a subset of general outdoor luggage produces predictable failures. Retail dry bags are sized to a human back, not to a 320 millimetre gap between a bed frame and a wheel arch. Retail duffels are round, and a round bag in a rectangular void wastes roughly a quarter of that void continuously. Retail organiser cubes are sold in sets of three identical sizes, which is exactly wrong for a van where every cavity has a different aperture. None of these are quality problems; all of them are shape problems, and shape is the variable a custom programme can actually control.
There is also a psychological dimension that shows up in buying behaviour. Someone who has spent four months and a significant sum building an interior does not want to put a bright orange expedition dry bag in it. The conversion community photographs and films its interiors constantly, and the interior is the product they are showing. Storage that reads as garden equipment is rejected on sight regardless of how well it performs, which pushes the whole category towards muted colours, matte finishes and labelling that can be hidden or removed.
Interior heat cycling is the dominant ageing mechanism
A parked van in sun is one of the harshest environments a consumer textile will ever sit in, and it is harsher than a motorhome because a panel van has more glass area relative to its volume and less insulation in the load space than a purpose-built habitation box. Interior air temperatures commonly run thirty to forty degrees above ambient, so a summer afternoon in southern Europe or the American southwest puts the cabin at sixty to seventy degrees Celsius, with surfaces behind the windscreen considerably hotter. Overnight at altitude or in shoulder season the same volume falls to single digits. That is one full cycle every twenty-four hours, for months.
| Component in the bag | What sustained heat does | How it presents to the owner | Specification response |
|---|---|---|---|
| Adhesive seam tape | Softens and creeps at the bond line | A seam that lifts or bubbles in the first summer | Tapes rated above the peak interior temperature, verified by an oven conditioning test |
| Heat-transfer logos and patches | Adhesive loses grip; edges lift | Decorations peeling in a van that never got wet | Adhesion testing on the actual coated shell at elevated temperature |
| Flexible PVC film | Plasticiser migration accelerates permanently | Film cracks at fold lines, especially at the collar | TPU rather than PVC wherever a closure depends on flexing |
| PU-coated face fabric | Hydrolysis in warm humid conditions | A tacky surface and a coating that rubs off | Coating chemistry selected for humid-heat service |
| Air trapped in a sealed bag | Internal pressure rise adds to stacked load | A bag that feels tight and stresses its own weld line | A valve or a closure that can be eased rather than a hard seal |
| Foam padding | Compression set accelerates when warm | Padding that stays flat and stops cushioning optics | Closed-cell foam specified with a compression-set figure |
The practical test is free and almost nobody runs it during sampling: load the bag, leave it in a closed vehicle in direct sun for a full afternoon, then inspect every adhesive joint, every print and every weld line. Doing that once in development prevents a season of field complaints. The material behaviour behind the table is covered in our page on thermal properties of waterproof materials, and structured versions of the same cycling are described in our note on temperature and humidity testing.
Two secondary effects follow from the same cycle and both are cheap to design against. Outgassing: a new coated bag in a hot sealed cabin releases volatiles into a very small air volume, and the owner notices it immediately, which is an argument for specifying low-odour coatings and for airing product before it ships. And condensation: a bag stored cold overnight then brought into a heated cabin collects moisture on its outer surface, and the interior of a small van has almost no airflow to clear it. Our discussion of condensation in sealed constructions covers the mechanism.
Mildew: wet gear in a sealed cabin is the number one van complaint
Ask any long-term van dweller what they hate about living in a vehicle and the answer is damp, not cold and not clutter. A van interior is a small, poorly ventilated volume heated by bodies and cooking, with cold metal panels on three sides. A wet wetsuit, a damp towel or a pair of muddy boots sealed into a bag inside that volume reaches near-saturation internal humidity within hours, and within two to three days the bag liner and everything touching it develops mildew. Once mildew has colonised a textile lining it does not wash out, and the bag is finished.
| Wet item | Water it carries into the cabin | Time to odour in a warm van | Design response that actually works |
|---|---|---|---|
| Wetsuit or swimwear | 0.5 to 1.5 L held in the fabric | 24 to 48 hours | A drainable welded wet bag hung outside the rear door, never stored inside |
| Walking boots with mud | 150 to 300 g in the uppers and tread | 48 to 72 hours | A vented boot bag with a mesh base, hung in moving air |
| Towel used once | 200 to 400 g | 24 hours | A mesh panel rather than a sealed pocket; dry it at the next stop |
| Rain shell stuffed wet | 150 to 250 g | 72 hours | A wet compartment with a drain path that exits the vehicle |
| Condensation on cold panels | Continuous, not an event | Ongoing | Air gap behind stored bags; nothing flat against bare metal |
The design conclusion is that the wet zone in a van must be able to leave the vehicle. Anything that holds water should hang from the rear door, a roof rack or an awning rail, because moving air dries in hours what a sealed cabin never dries at all. That argues for a wet bag with a reinforced hang loop, a drain grommet at the lowest point, and a smooth welded liner that can be wiped rather than a textile one that absorbs. Our page on wet-dry separation construction explains the build, and ventilated mesh panels cover the drying side.
Linings deserve a specific decision because this is where the cost is small and the benefit is large. An antimicrobial treatment on the liner does not remove the need to dry things, but it converts a bag that smells after two days into one that smells after five, which is the difference between a product that gets recommended and one that gets thrown away. The trade-offs and the testing behind them are set out in our review of antimicrobial treatments for bag materials.
- Never store wet kit inside the cabin overnight; the vehicle is too small to absorb the moisture load.
- Specify a drain grommet at the true lowest point of any wet bag, and verify it drains when hung rather than when flat.
- Use smooth welded linings in wet zones and keep textile out of them entirely.
- Create an air gap of at least ten millimetres behind anything stored against a bare metal panel.
- Give the wet bag a reinforced hang loop rated for a full wet load, because a wet wetsuit is heavier than owners expect.
Vibration, rattle and the fixing points you drilled yourself
A factory camper has engineered mounting points. A self-build has whatever the owner fixed into the ribs, and the load path from a bag to the chassis is a chain of the owner’s own decisions. Everything aboard therefore sees continuous low-amplitude vibration from the road surface, for hours at a time, at frequencies set by speed, road texture, tyre pressure and suspension. Nothing about that regime appears in a static load test, and the failures it produces look like manufacturing defects to anyone who has not thought about it.
- Fatigue at strap anchors: a webbing tab stitched or bonded to a panel sees millions of small load reversals and separates at the attachment rather than in the webbing.
- Self-loosening: a side-release buckle under sustained vibration can walk itself open, and a bag that opens in a cupboard empties onto whatever is beneath it.
- Chafe: a bag resting against a cut edge of plywood or a bolt head wears a hole at that exact spot, slowly and then suddenly.
- Fastener back-out: whatever the owner screwed into the rib loosens, so the bag mount fails rather than the bag.
- Fretting at stitch lines: two surfaces rubbing microscopically wear through thread faster than through fabric.
Rattle is the complaint owners actually make, and in a van it is worse than in a motorhome because the sleeping space and the storage space are the same volume. Metal hardware in a locker rattles all night and people notice it at two in the morning. Polymer hardware, soft attachment loops and covered buckle housings are cheap decisions that materially improve the ownership experience, and they also remove the corrosion risk that coastal van life brings. Our article on static load testing for straps and handles covers the static case; the amendment for this channel is to ask the supplier whether they have run a cyclic or shake test at all, because a static pull rating says nothing about fatigue life.
One countermeasure is worth specifying explicitly because it costs almost nothing: webbing continued under the base of the bag rather than terminating in a panel. That single change moves the fatigue load from a concentrated attachment into a distributed seam, and it is the difference between a bag that loses its strap in month four and one that does not. Mounting hardware should be corrosion-resistant throughout, because van interiors see condensation and coastal trips see salt air, and guidance on securing loads in vehicles is published by the National Highway Traffic Safety Administration.
Vertical space and the hang point that survives corrugations
Floor area in a van is contested by the bed, the galley and the walkway; wall area is free. That asymmetry is why the aftermarket for van interiors is dominated by hanging organisers, over-door pockets and wall-mounted kits, and it is why a hanging bag is the highest-value item in a van range. But a hanging bag in a moving vehicle is a pendulum with a road-induced input, and the load is small while the cycle count is enormous — the classic fatigue condition that static testing does not predict.
A hang loop carrying three kilograms in a vibrating van sees on the order of a million small load reversals across a long trip. A loop stitched into a single panel eventually tears out at the stitch line; a loop whose webbing continues into the body distributes that load and survives. Two hanging points rather than one stop the bag from twisting and swinging, which is itself a source of rattle. Grommets only work where the surrounding material is reinforced, because an unsupported grommet tears out under vibration far sooner than under a single hard pull.
- Webbing continued into the body rather than stitched onto the surface, so the fatigue load is shared.
- Two hanging points rather than one, so the bag cannot swing, twist or rattle.
- A hook or loop geometry that cannot disengage itself, which rules out several open hook designs entirely.
- A quick-release method, because bags come down every time the vehicle moves on.
- Corrosion-resistant fitting throughout, for condensation and coastal salt air.
The door is the most valuable hanging surface and the most abused. A bag hung on a rear door is opened and slammed several times a day, so the attachment sees shock loads on top of road vibration, and the contents are thrown against the door skin repeatedly. Anything hung there should be soft-bodied, and anything fragile inside it should be padded. The general principle of trading capacity against shape, which governs the whole category, is set out in our capacity selection guide.
Designing to millimetres: custom dimensions beat capacity
Capacity is the least useful number on a van storage bag. What matters is the height of the aperture, the depth of the void and whether the bag can be inserted one-handed while lying on a bed. Three specific cavities recur in almost every conversion and each one defeats standard product: the gap between the bed platform and the wheel arch, typically 250 to 400 millimetres high and tapering; the void above the cab, which is long and shallow; and the under-bench space, which is deep but has a restricted opening because the bench front only lifts so far.
A bag built to those millimetres is worth more to the owner than one with thirty per cent more volume and the wrong profile, because the wrong profile simply will not go in. This is the strongest commercial argument for dimensional customisation in the whole outdoor category: almost no other channel rewards three heights of the same body as directly as this one does. The production trick is to hold the construction constant and vary only the cut length, so the range shares tooling, fabric and trim while fitting layouts that a single fixed shape cannot serve.
Compression when empty is the second half of the same requirement, and it is routinely missed. A van is lived in at partial load most of the time; a bag that holds its shape when half empty consumes space every single day. State the packed height of the empty compressed bag as a specification line, not just the filled volume, and design for it with a soft body, no internal frame and a closure that folds flat. The home and garage parallel — the same modular logic applied to a fixed space — sits in our page on storage and organisation bags.
Where water in a van actually comes from
Almost none of it is rain getting in through the shell. Water enters a van conversion at the doorway on boots and coats, at the sink, at the water container and pump, at the rear door when it is opened in weather, in the shower if there is one, and as condensation on cold single-skin panels every night of the year. All of it arrives at floor level, all of it is fresh water, and all of it is continuous rather than an event. That is a different design problem from rain on a backpack, and it is why a high immersion rating on a van bag is spending budget on a case that does not occur.
The response is a wet zone at the doorway that drains, plus a pump and plumbing bay that contains a leak rather than one that resists it. A water system in a moving vehicle will eventually weep at a fitting; the question is whether the weep lands on a plywood floor or in a welded tray. A bag with a welded base and a chemical-tolerant liner placed under the pump is a ten-dollar answer to a five-hundred-dollar problem, and it is the item in a van range that generates the most word-of-mouth because it visibly saves the build.
Cooking is the other moisture source and it is underestimated. Boiling a pan of water in a sealed nine-square-metre cabin puts hundreds of grams of vapour into the air, and it condenses on the coldest surface available, which is usually the metal roof or the back of a cupboard. Anything stored flat against those surfaces gets damp from the inside of the vehicle rather than from outside it. Ventilation and an air gap do more here than any coating, and the habit worth teaching owners is to run a roof vent while cooking and to keep stored bags off bare metal.
Modular nesting sets and the compression premium
The system logic for a van is the same as for a small flat: a set that nests and compresses beats one large item in every measure that matters aboard. Three soft bags that nest into one another fit awkward apertures, distribute weight sensibly, allow selective unpacking without disturbing everything, and occupy the volume of the largest item when empty. A single large bag does none of those things and wastes space on every day of the trip. This reasoning is set out generally in our page on stuff sacks and organisation systems.
- State the compressed empty height as a specification line, not just the filled volume.
- Design sizes to nest, so three items occupy the volume of the largest rather than the sum.
- Give each item an external identity — colour, patch or label panel — because van cupboards are dark.
- Prefer soft bodies throughout; anything semi-rigid fails to use irregular space.
- Size the set against the actual cavities in the target vehicle platforms, which is worth asking customers about in the brief.
Weight distribution carries a safety dimension that surprises people. In a van, where mass goes affects handling, braking and axle loading, and a bag that is convenient to stow high is the wrong place for anything dense. A modular system with an obvious size hierarchy lets an owner put heavy items low without thinking about it. It is a small design contribution to something that matters, and it is a legitimate argument in favour of selling a nesting set rather than a single large bag.
Closure choice under dust, cold and one-handed use
Van life spans beach mornings, desert tracks and frozen alpine car parks, and the closure has to work across all of them while being operated one-handed through a doorway. A roll-top is the right answer for a genuinely wet item and the wrong answer for anything accessed ten times a day, because it needs two hands, free collar height and a straight fold. A coated zip with a storm flap is better for dust, better for daily access and better when the bag is stuffed, and it can be brushed clean without water, which matters when water is the resource you are rationing.
Cold has its own closure consequence that is easy to miss. A coated waterproof zip stiffens significantly below freezing, and a slider that needs a firm pull at minus five is a slider that gets forced, which is how teeth and coatings get damaged. Specify a pull tab large enough to use in a glove, test the closure cold as well as warm, and prefer a storm flap that does the sealing work so the zip is not the only barrier. Our comparison of closure families gives the full trade-off, and the hardware side is covered in our page on hardware selection.
Construction choice follows from the same logic as everywhere in this library: welded bases wherever a spill could pool, stitched and taped bodies where repairability on the road matters more. Long-term van dwellers fix things rather than replace them, and a welded TPU bag cannot usefully be sewn in the field, so a repair patch in the pack is worth more than a marginal rating increase. The trade-offs are set out in our article on stitched, welded and bonded constructions.
The electrical bay: batteries, cables and why separation wins
Most modern conversions carry a lithium house battery, an inverter, a solar controller and a spaghetti of cable, and the owner will ask whether any of it should live in a bag. The honest answer is that high-current electrical equipment should be mounted, not bagged, and the bag’s job is the accessories around it: cables, adapters, a portable panel’s leads, tools and spares. That is still a real product with real requirements, and it is the item most van ranges omit.
Three requirements govern it. Non-absorbent lining, because a bag that holds moisture next to copper and connectors is a corrosion problem waiting to happen, and because terminal cleaning spray and dielectric grease should not soak into a textile. Compartmentation that keeps metal tools away from battery terminals, since a loose spanner across a lithium bank is the failure mode that ends a trip and sometimes a vehicle. And an exterior that can be wiped, because cable dust and insulation debris accumulate. Terminal cleaning agents and electrolyte residue are more aggressive than seawater, and the comparison data sits in our review of chemical resistance.
One specification line deserves to be non-negotiable: no metal hardware inside the electrical bag, and no exposed conductive trim. Polymer buckles, polymer sliders and covered attachment points remove the risk entirely at no cost, and it is the kind of detail that gets a product recommended in a community that shares build photos and warnings obsessively.
Payload arithmetic: what a bag system costs the vehicle
Vans are weight-limited in a way cars are not, and a full conversion frequently runs within one or two hundred kilograms of its gross vehicle weight rating once water, fuel and passengers are counted. Every kilogram of storage is a kilogram of payload removed, which is the same argument as the cabin allowance on a flight but with a longer list of consequences: braking distance, tyre load, insurance classification in some markets and, at the extreme, a plating category. That makes the gram cost of a bag system a genuine engineering input rather than a marketing one.
| Choice | Typical mass | Payload cost over a five-bag system | Verdict |
|---|---|---|---|
| Soft nesting set, three sizes | 90 to 180 g each | Under 1 kg total | Correct; compresses and nests |
| Semi-rigid organiser cubes | 250 to 400 g each | 1.5 to 2 kg total | Wrong; rigid walls waste space and mass |
| Metal hardware throughout | plus 120 to 250 g per bag | plus 0.6 to 1.2 kg | Reject; polymer is lighter, quieter and corrosion-proof |
| Welded wet bag with hang loop | 250 to 450 g | One item, 0.3 to 0.5 kg | Pay it; it prevents the mildew problem entirely |
| Heavy denier shell everywhere | plus 150 to 300 g per bag | plus 0.8 to 1.5 kg | Only on bags that meet abrasion; not by default |
The table says something simple and slightly counter-intuitive: buying five cheap heavy bags costs more payload than buying four well-specified ones. Weight discipline in this category is not about ultralight hiking obsessiveness, it is about the fact that the vehicle has a legal limit and the owner is going to fill whatever margin exists. The general discipline is covered in our piece on lightweight material optimisation, and the denier decision behind the last row sits in our note on denier and durability.
A five-format system matrix for a self-build
Five formats cover van life well, and the test of a good range is whether three of the five can be nested, hung and identified in a dark cupboard, not whether each item is individually excellent. The matrix below is written as a specification rather than a product list, because buying against a specification survives model changes and buying against a brand name does not.
| Format | Volume and shape | Job it does | Governing requirement |
|---|---|---|---|
| Cavity bag | 15 to 35 L, low profile, three heights | The gap above the wheel arch or under the bench | Cut to the millimetre; soft; compresses flat when empty |
| Nesting cabin set | 5 to 25 L, three nesting sizes | Clothing and personal kit in the living space | Compresses flat; nests; identifiable in a dark cupboard |
| Door-hung wet bag | 15 to 25 L, welded, drainable | Wetsuits, boots, wet coats at the doorway | Reinforced hang loop; drain grommet; hangs outside the vehicle |
| Plumbing and fluid bay bag | 10 to 20 L, welded base | Pump, fittings, cleaning agents, spare water container | Chemical-tolerant liner; holds a leak; non-absorbent interior |
| Wall organiser | 10 to 20 L, flat, two hang points | Keys, documents, chargers, tools near the door | Reinforced loops; quick release; polymer hardware; no rattle |
The nesting set is the commercial core and the cavity bag is the differentiator, because the cavity bag is the one no general outdoor brand makes and the one that proves the range was designed for this customer. Together they also solve the merchandising problem: the set sells as a set, which suits direct and retail channels far better than a single bag does.
Commercially, five formats on three or four constructions gives twelve to fifteen SKUs with every style above the 500-piece minimum per style, which is the structure that makes the channel viable. Planning detail is in our note on minimum quantities and production slots.
Specifying a van life range commercially
The van conversion channel is commercially attractive for structural reasons: it is growing, it is content-rich, customers buy sets rather than singles, and the same range serves campervan, overland, ski-season and festival segments with only graphic changes. Volumes follow van registrations and conversion activity, which are published and therefore forecastable. It is also a channel where the customer will tell you exactly what is wrong, in public, in detail, which is worth more than any focus group.
The structure that works is a platform: three or four constructions behind five formats, with colourways and labelling carrying the merchandising work, plus dimensional variants produced by varying cut length rather than by retooling. That keeps each style comfortably above the 500-piece minimum per style instead of fragmenting volume across eight bodies. Branding has one constraint and one opportunity. The constraint is that van bags live in hot, dusty, abrasive interiors, so ink films on contact faces are removed within a season and decoration belongs on protected panels or as a welded badge; see our guide to logo methods and their durability. The opportunity is that muted matte exteriors are what this customer actually wants, so the aesthetic constraint costs nothing to satisfy.
- Offer three cut heights of the cavity bag at one construction rather than one compromise size.
- Ship a repair patch and a spare buckle with every bag; this community fixes rather than replaces.
- Keep exteriors matte and muted; bright expedition colours are actively rejected in this channel.
- Air and odour-test product before shipping, because a new coated bag in a sealed cabin is immediately noticed.
- Ask customers for their vehicle layout drawings; it converts a specification from a guess into a fitted product.
Two commercial notes close it out. Repairability sells here more than in almost any other outdoor channel, and a patch, a spare slider and a spare buckle in the pack cost cents and generate loyalty out of proportion. And the accessory that sells best after the nesting set is the door-hung wet bag, because damp is the problem every van dweller has and nobody has solved. Vehicle-level test practice and standards are published by SAE International, and guidance on indoor moisture and mould in small enclosed spaces is published by the US Environmental Protection Agency. If you are specifying a van life range, review our process from first enquiry through sampling into bulk production and send us the vehicle layouts, cavity dimensions, trip profiles and any failure history you already have. Sampling takes 6–10 working days, bulk production runs 35–50 days, and quotations are issued FOB Xiamen.
Frequently Asked Questions
Q1. Do van life bags need a high waterproof rating?
Usually not. Nothing inside a van immerses a bag. The exposures that matter are interior heat cycling, mildew from damp kit, vibration at the fixing points and dust. Spend the budget on ventilation, drainage and fatigue resistance instead of a submersion rating.
Q2. How hot does a converted van get inside in summer?
Interior air commonly runs thirty to forty degrees above ambient, so sixty to seventy degrees Celsius in a warm climate, with surfaces behind the windscreen hotter. That softens adhesives and permanently drives plasticiser out of flexible films.
Q3. Why does my van smell damp even when nothing got wet?
Cooking, breathing and condensation on cold single-skin panels put continuous moisture into a very small volume. A wet item sealed in a bag reaches saturation within hours and mildew follows in two to three days.
Q4. Should wet gear be stored inside the van overnight?
No. Hang it outside on the rear door, roof rack or awning rail in a drainable welded bag. Moving air dries in hours what a sealed cabin never dries at all, and an air gap behind anything stored against bare metal prevents condensation wetting.
Q5. Why do straps and hang loops fail in campervans?
Vibration fatigue. A webbing anchor in a moving vehicle sees millions of small load reversals and separates at the attachment rather than breaking in the webbing. Continue the webbing under the base and use two hanging points.
Q6. Is a roll-top or a zip better for van storage?
A coated zip with a storm flap for daily access and dust, because it opens fast and can be brushed clean. Reserve roll-tops for genuinely wet items, and check that the slider still works below freezing in a glove.
Q7. Can I make bags fit my specific conversion dimensions?
Yes, and it is the highest-value thing in this channel. Hold the construction constant and vary the cut length, so three heights of one body share tooling and fabric while fitting wheel-arch, under-bench and over-cab cavities.
Q8. What is the single most useful bag in a campervan?
A door-hung wet bag with a reinforced loop and a drain grommet. Damp is the universal complaint in van life, and removing wet kit from the cabin solves most of it in one move.
Q9. How much weight does a full bag system add to payload?
A well-specified five-bag soft system is under two kilograms. Five cheap semi-rigid organiser cubes can cost three or more, and vans frequently run within a couple of hundred kilograms of their gross vehicle weight rating.
Q10. Should electrical accessories be stored in a bag?
Mount the battery and inverter; bag the cables, adapters and tools. Specify a non-absorbent lining and no metal hardware or conductive trim inside, so a loose tool can never bridge a terminal.
Q11. Why does my bag rattle at night in the van?
Metal hardware in a cupboard vibrates against the panel, and in a van the storage volume is also the sleeping volume. Polymer hardware, soft loops and covered buckle housings remove it at no cost.
Q12. Can a welded waterproof bag be repaired on the road?
Not by sewing. Carry a urethane adhesive patch and repair tape, and specify a material that accepts a heat-applied or adhesive patch. A stitched and taped bag can be roughly field-sewn if needed.
Q13. How do I stop mud and grit getting into van storage?
Use storm-flapped zips rather than roll-tops, smooth wipe-clean exteriors and closures that can be brushed clean without water. Keep a vented boot bag at the doorway so grit never enters the living space.
Q14. What lining should a van bag have?
A smooth non-absorbent welded liner in wet and chemical zones, with an antimicrobial treatment on anything that could hold damp kit. Textile linings in a wet zone guarantee odour within a week.
Q15. Why do logos peel off bags stored in vans?
Sustained interior heat at sixty degrees or more exceeds the rating of many adhesives. Test adhesion on the actual coated shell at elevated temperature during sampling rather than at room temperature.
Q16. How many formats should a van life range carry?
Five: a cavity bag in three heights, a nesting cabin set, a door-hung wet bag, a plumbing and fluid bay bag and a wall organiser. Three or four constructions behind them keeps every style above the minimum order requirement.
Q17. What colours work in the van conversion market?
Muted matte exteriors. This customer photographs the interior constantly and rejects anything that reads as bright expedition gear, so the aesthetic constraint is easy to satisfy and costs nothing to meet.
People Also Ask
Do van life bags need to be fully waterproof?
No. Heat cycling, mildew, vibration and dust are the real exposures. Buy drainage, ventilation and fatigue-resistant attachments rather than a submersion rating.
How do I stop damp and mildew in a campervan?
Move wet kit out of the cabin. Hang a drainable welded bag on the rear door, keep an air gap behind stored bags and ventilate while cooking.
Why do straps break on bags in a van?
Vibration fatigue at the attachment point, not failure in the webbing. Continue webbing under the base and reinforce every anchor.
Can bags be made to fit my van conversion?
Yes. Vary the cut length at one construction to make three heights, so the range fits wheel-arch and under-bench cavities without retooling.
What is the best bag for a van conversion?
A door-hung drainable wet bag first, then a nesting soft set that compresses flat. Both address the two complaints that actually matter: damp and wasted space.
Should I keep cables and tools near the house battery?
Keep them in a separate non-absorbent bag with polymer hardware only, so no metal object can bridge a terminal and no moisture sits next to copper.