Waterproof bag product photography fails in a way that general bag photography does not, because the thing being sold cannot be seen. A customer looking at a dry bag photograph is being asked to believe that water will not enter it, and no angle, no light and no retouching can show that. The only way to close the gap is to photograph the demonstration rather than the object: water going on, the interior staying dry, and the proof object — a paper towel, a phone, a printed page — coming out unchanged. Brands that treat the shoot as a pack-shot exercise end up with beautiful galleries that convert like a commodity listing, because every competitor can produce the same beautiful gallery.
This guide sets out how to run that shoot as evidence production. It covers why invisible performance must be staged as a before-during-after sequence, why reflective TPU and PVC coatings are the single most common way this category is shot badly, how glare turns a technical fabric into cheap-looking plastic, what white-background and in-scene imagery each actually convert, how to give a bag with no size intuition a credible scale reference, where video earns its cost and where a still sequence beats it, how to shoot closures and hardware because that is what buyers doubt, how coated fabric shifts colour between daylight and screen, how one shoot day should feed the DTC store, the marketplace listing and the B2B sell-in page, and what a realistic shoot budget and governance model look like. QUANZHOU JUNYUAN BAGS has produced custom waterproof bags since 2014 in a 4,950 m² SGS-verified facility: MOQ 500 pieces per style, sampling in 6–10 working days, bulk in 35–50 days, FOB Xiamen.
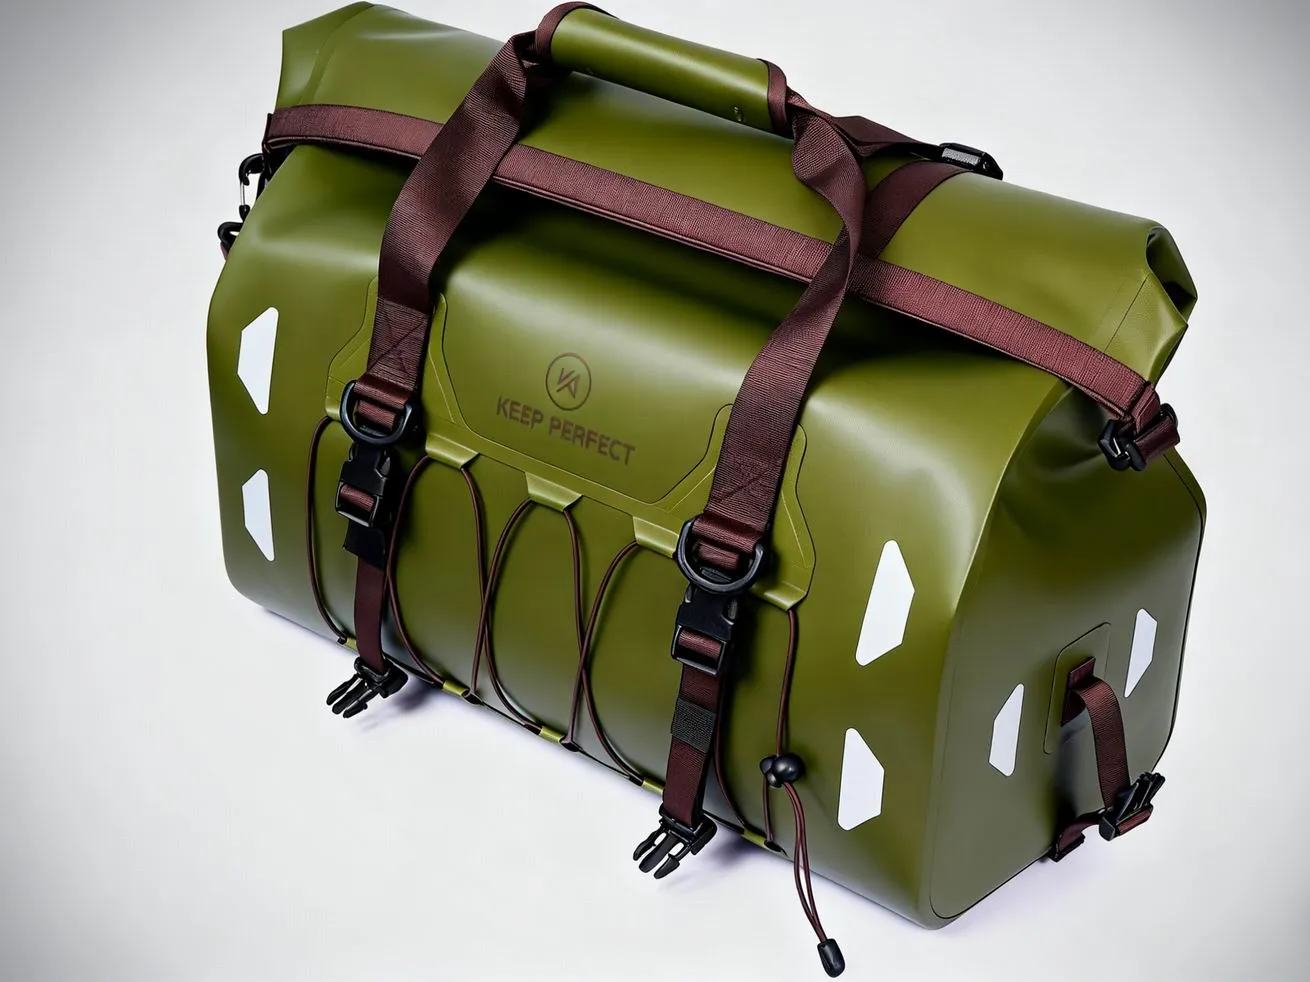
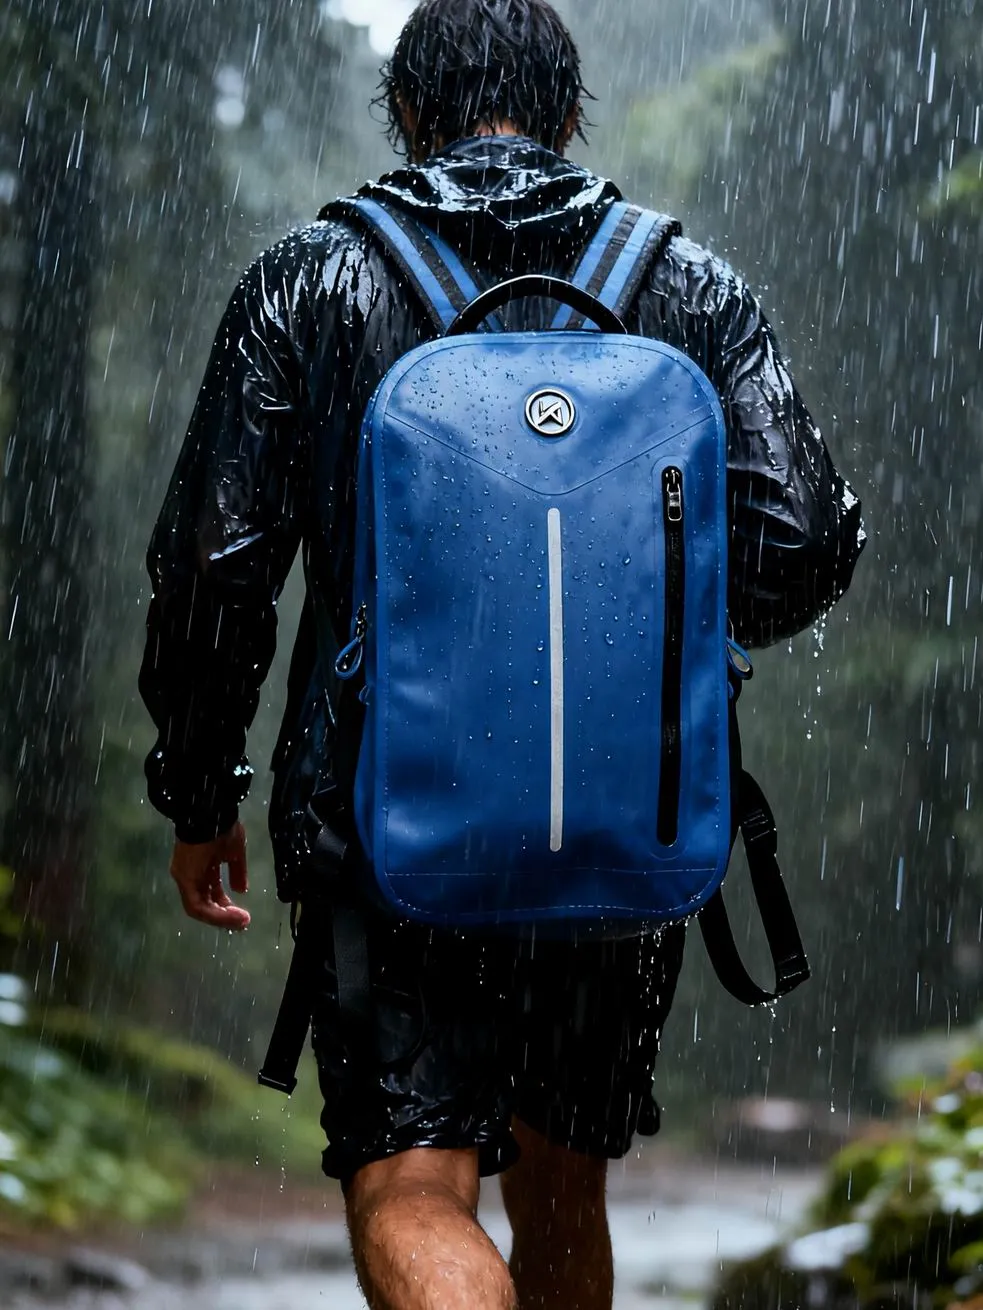
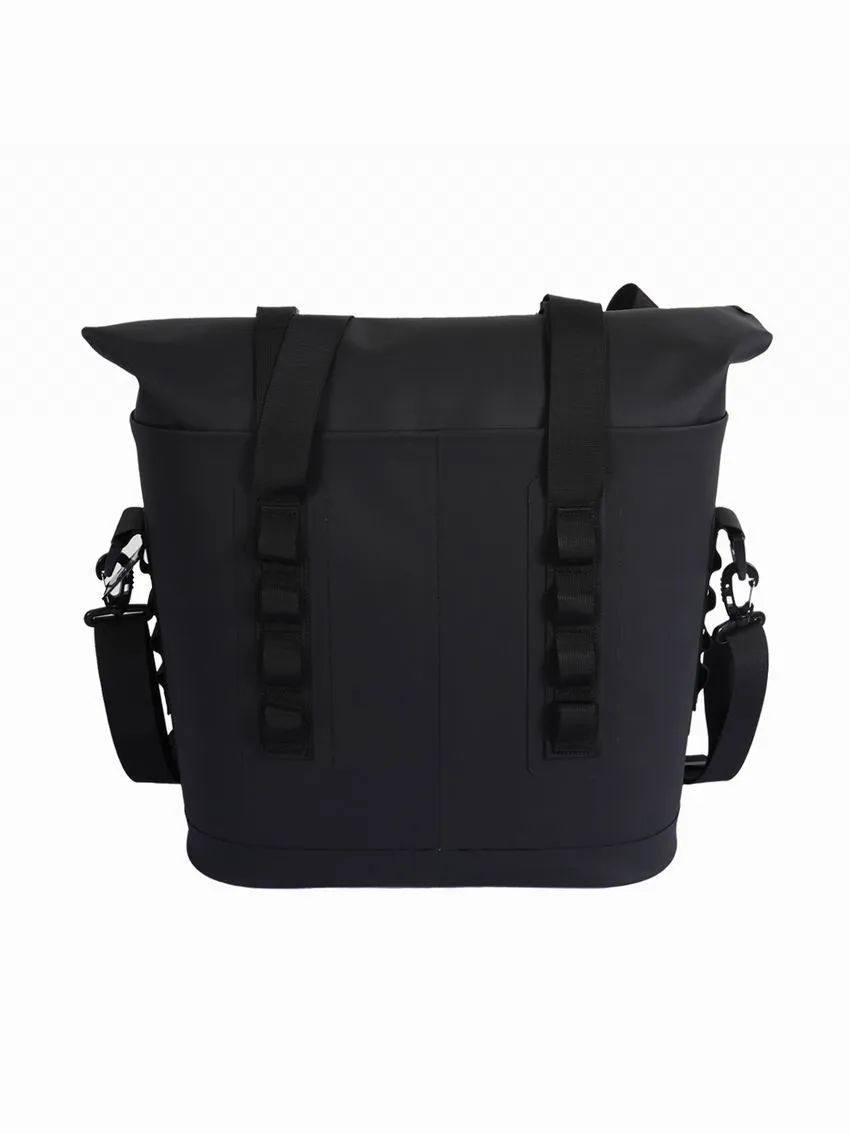
Photograph the demonstration, not the object
Most waterproof bag product photography is commissioned as if the product were a fashion accessory, and that is why it underperforms on ecommerce conversion. A pack-shot answers questions about shape, colour and styling, none of which are the reason someone buys a dry bag. The reason is a fear: that water will reach something valuable. Fear is not reduced by an attractive image; it is reduced by a visible test with a visible result. That means the hero frame of a waterproof listing is rarely the bag itself, it is the bag in the act of being exposed to water with the interior demonstrably unaffected.
The mechanism is simple to state and easy to get wrong. A buyer arrives with a latent objection — “will it actually keep my things dry?” — and scans imagery for disconfirming evidence. If the gallery offers only styling, the objection survives to the checkout, where it either blocks the sale or produces a return later. If the gallery offers a recognisable test with a clean result, the objection is resolved in eight seconds and the price comparison that follows is far less brutal.
| Shot | What it proves | Production cost | Where it belongs in the gallery |
|---|---|---|---|
| Submerged bag with dry paper towel inside | The core promise under a stated depth and duration | Low: a tank or tub, water, one hour | Frame 1 or 2, above the fold |
| Shower or hose spray at a stated rate and time | Rain and splash performance for commuter products | Low to moderate: hose, nozzle, tripod | Frame 2 or 3 for urban ranges |
| Interior opened after the test, contents dry | That the result was real and not staged | Low | Immediately after the test frame |
| Roll-top or zipper operated in sequence | That the closure can actually be closed by a human | Low | Mid-gallery, plus a short clip |
| Seam and weld close-up with a caption | Construction quality that justifies the price | Low: macro lens or phone macro mode | Mid-gallery, near the price |
| Bag beside a familiar scale object | Capacity and proportion | Very low | Always, on every size variant |
| Loaded interior with the device it protects | That the buyer’s actual object fits | Low | Before the specification block |
Two rules make the difference between evidence and theatre. First, state the conditions in the image or its caption: depth, duration, load, and closure method. “Thirty minutes at one metre, fully submerged, roll-top closed with three folds” is a claim a competitor can be compared against and a regulator can ask about; “waterproof” printed over a splash is neither. Second, never cut the take. A continuous shot of the bag going in and coming out and opening is worth more than three polished shots with edits between them, because edits are exactly what a sceptical buyer looks for.
Keep the imagery consistent with the technical language elsewhere on the site. If the product carries an ingress rating, the photograph should illustrate that rating rather than imply a stronger one; a submerged shot on a product rated only for spray is a compliance problem as well as a returns problem. The rating structure is explained in the IPX rating explainer, and the construction differences that a close-up is meant to reveal are set out in the comparison of stitched, welded and bonded construction.
Reflective coatings are where this category gets shot badly
Ask any experienced ecommerce photographer which product category is hardest to make look expensive, and coated technical fabric ranks near the top. TPU laminate, PVC sheet and silicone-coated nylon are all specular surfaces: they reflect a hard light source as a small, extremely bright highlight. On camera that highlight clips to pure white, the surrounding shadow goes muddy, and the eye reads the material as thin, glossy plastic rather than as engineered fabric. The product in hand looks technical and matte; the product on screen looks like a carrier bag.
The failure mode is predictable. A single bare flash or a small softbox placed close to the bag produces a blown highlight roughly the size of a coin on every curve of the fabric. Because the fabric is usually dark or saturated, the contrast between that clipped highlight and the rest of the frame is extreme, and no amount of post-production recovers detail that was never recorded. The buyer does not think “the lighting is harsh”; they think “this looks cheap”, and they price the product accordingly.
- Move the light source further away and make it larger relative to the subject; a two-metre diffusion panel at three metres beats a small softbox at one metre.
- Use broad, low-contrast fill from both sides to keep the highlight below clipping while retaining enough modelling to show shape.
- Angle the camera slightly off the axis of the reflection so the specular highlight falls outside the frame or on a less critical area.
- Shoot in a mid-tone environment rather than a black void, so the reflected surround carries texture instead of a hard black edge.
- Check the histogram on the highlight, not the overall exposure: if the top end is clipped on the fabric, the shot is unusable regardless of how it looks on a phone.
- Avoid direct on-camera flash entirely for coated fabric; it is the fastest route to a plastic look.
Polarisation is the other lever, and it is underused. A circular polariser on the lens, or polarising film over the light source, removes a meaningful share of the surface reflection from a coated material and lets the base colour and weave come through. The trade-off is a stop or two of light, which is affordable in a studio and expensive outdoors in low light. Where a product range is shot repeatedly, building a fixed polarised setup pays back within a season.
Retouching cannot fix this and usually makes it worse. The instinct is to pull the highlight down in post, which produces a grey, flat patch where a highlight used to be — the visual signature of a cheap product photographed badly and then corrected badly. The only real fixes are optical and happen on the day: bigger source, greater distance, polarisation, and a camera angle chosen with the reflection in mind.
White background versus in-scene: what each actually converts
The white-background pack-shot exists for one reason: comparability. On a marketplace, in a grid, and in a size-variant selector, a clean isolated image lets a buyer compare two products without the distraction of context. It is a hygiene requirement, not a conversion asset. In-scene imagery does the opposite: it costs more, it is harder to shoot well, and it is what actually tells the buyer whether this bag belongs in their life.
The data-free way to think about it is by the question each format answers. A white-background shot answers “what does it look like?” An in-scene shot answers “what is it for, and will it work in my conditions?” In a functional category the second question is the one blocking the sale, which is why galleries that stop at pack-shots plateau. But in-scene imagery that is styled rather than informative — a bag on a rock at golden hour with no water anywhere — answers neither question and merely costs more.
| Format | Best use | Typical cost driver | What it converts |
|---|---|---|---|
| Pure white isolated pack-shot | Marketplace grids, variant swatches, size comparison | Low; repeatable in a fixed setup | Comparability and catalogue hygiene |
| Light grey or mid-tone seamless | Brand store hero images for dark or saturated fabric | Low to moderate | Perceived material quality without hard clipping |
| In-scene, dry context | Lifestyle pages, email headers, paid social | Moderate: location, talent, weather risk | Belonging and aspiration |
| In-scene, wet or submerged context | Product page hero, proof blocks, B2B evidence | Moderate: water handling, safety, more takes | Belief in the performance claim |
| Cutaway or exploded view | Construction explanation near the price | Low: studio plus basic compositing | Justification of a price premium |
| Macro detail on seam, weld, closure | Objection handling for technical buyers | Low | Confidence in manufacturing quality |
The practical allocation for a new range is roughly four clean pack-shots per colourway plus three to five evidence and context frames. That is enough to satisfy marketplace image requirements and enough to carry a product page without a second shoot. Brands that commission twenty lifestyle frames and two pack-shots discover the problem at listing time, when the channel that actually produces volume demands images they do not have.
One nuance matters for dark waterproof fabric: pure white is often the wrong seamless. A matte black dry bag on a white sweep produces extreme edge contrast, and the automatic exposure on a phone camera tends to darken the product further, so the material reads as flat black with no texture. A mid-grey or a slightly toned sweep, matched to the product’s brightness, preserves edge definition and shows the weave. It also looks deliberate rather than cheap.
Scale references: waterproof bags have no size intuition
Capacity in litres is a number almost nobody can picture, and waterproof products make it worse because their shape is unfamiliar. A roll-top dry bag is a soft cylinder whose volume changes as you roll it, so even a printed dimension does not tell a buyer what it will look like on a shoulder or in a kayak hatch. Size-related disappointment is one of the largest single return drivers in this category, and it is a photography problem before it is a specification problem.
The fix is cheap and consistently skipped: put a familiar object in the frame, every time, on every size variant. Not a ruler — a ruler is read as technical documentation and is ignored by most buyers — but an object whose size the buyer already knows from daily life. A two-litre drinks bottle, a fifteen-inch laptop, a one-litre water bottle, a standard A4 folder, or a person whose hand and forearm are visible.
| Product type | Effective scale reference | Why it works | Common mistake |
|---|---|---|---|
| Small pouch or phone case | A smartphone beside it, plus a hand holding it | Every buyer owns one and knows its size exactly | Shooting it alone on white, where it looks either tiny or huge |
| Daypack 15 to 25 litres | A 15-inch laptop next to it and a 1-litre bottle inside the side pocket | Anchors the two things buyers actually care about fitting | Only showing it on a model, whose size varies by shot |
| Dry bag 5 to 20 litres | A two-litre drinks bottle inside, plus the same bag held in one hand | Shows both volume and how it carries | Shooting the bag fully rolled and empty, which hides capacity |
| Duffel 40 to 60 litres | A packing cube set and a folded jacket inside, plus a person lifting it | Connects litres to a real packing job | Using a wide-angle lens that exaggerates the bag’s size |
| Tote or shopper | Groceries or a laptop and a water bottle, plus a hand on the handle | Totes are judged by what they swallow | No reference at all because the styling looked cleaner |
Lens choice matters as much as the prop. A wide-angle phone lens at arm’s length exaggerates near objects and makes a small bag look substantial; a short telephoto compresses and flatters. For product photography, use a moderate focal length — roughly 50mm equivalent on a full frame, or 2x on a phone — and keep the distance consistent across the range so that a ten-litre and a twenty-litre bag photographed the same day are genuinely comparable. Inconsistent focal length across a range is a quiet but real source of size returns.
Pair the imagery with exact numbers rather than letting it substitute for them. Internal dimensions, the largest device that fits, empty weight and strap adjustment range should sit next to the scale photographs, and the reasoning is set out in the dry bag sizing guide. Photography reduces uncertainty; specification removes it. Using one without the other leaves the return rate higher than it needs to be.
The before, during, after sequence that carries the claim
Evidence imagery works because it follows a structure the viewer already trusts from every science demonstration they have ever seen: show the initial state, apply the stress, show the final state. Skip any of the three and the sequence loses most of its power. A photograph of a dry bag sitting in water proves nothing without a before frame, because the viewer cannot know the interior was dry to begin with. A photograph of a dry paper towel proves nothing without a during frame, because the viewer cannot know the bag was actually submerged.
- Before: the interior with the proof object visible and the closure open, shot close enough to read the object.
- Before: the closure being rolled or zipped, with the number of folds or the zipper travel shown, so the condition is reproducible.
- During: the bag under water or under spray, with something in frame that indicates depth or duration — a marked tank, a visible timer, or a stated caption.
- After: the exterior dried with a towel first, which prevents the obvious objection that the water never got near the opening.
- After: the interior opened in one continuous take, with the proof object lifted out and shown to camera.
- Caption: depth, duration, load and closure method stated as a sentence, not as adjectives.
The proof object choice is a real decision. A paper towel is the strongest because it fails visibly and instantly; a phone is the most emotive for commuter products but raises the stakes if anything goes wrong, and a printed page is a good middle ground because a single droplet is obvious on it. For a product that only claims spray resistance, do not stage a submersion test — stage a shower test at a stated rate and duration, which is honest and still visual.
Water on the outside of the bag after the test is useful, not embarrassing. Drying the exterior with a towel before opening the bag, and showing that step, pre-empts the single most common sceptical reading of this kind of content: that the water on the outside would have dripped in when opened. Retail and packaging presentation of the same evidence is covered in the packaging design guide, because the insert in the box is the one piece of evidence every customer actually receives.
Video versus stills: where each earns its cost
Video wins on credibility and loses on scannability. A continuous clip of a bag being submerged, held down and opened resolves doubt in a way no still can, because it removes the possibility of a swap between frames. But a buyer scanning a product page will not watch thirty seconds before deciding, and autoplay video on a category page is a bounce risk on mobile data. Stills win on speed and on the marketplace, where video slots are limited and often ignored.
The right allocation is to let each format do what only it can do. Use stills for the gallery, the variant selector, the marketplace and every context where the buyer is scanning. Use video for the single moment that requires continuity — the submersion, the roll-top operation, the zipper running its full length — and cut it down to six to twelve seconds with the result visible in the first three.
- Never gate the proof behind a play button alone: put a still of the result frame next to the video so a non-watcher still receives the evidence.
- Shoot video horizontally and vertically in the same session, or shoot wide enough to crop; channel requirements differ and a reshoot is expensive.
- Keep audio clean and neutral, or mute it entirely and rely on captions, since most product video is watched muted.
- Record the master at the highest resolution you can store and keep the uncut original; future channels always want a different crop.
- One continuous take beats three angles edited together for the core claim; multiple angles beat one take for construction explanation.
Cost is not proportional to value here. A single afternoon of competent video work can produce the hero clip, three stills extracted from the same footage, a marketplace image, an email block and a B2B presentation frame. A dedicated multi-location lifestyle video shoot costs an order of magnitude more and typically produces assets that only one channel can use. Budget the evidence shoot first and treat lifestyle video as a later, discretionary spend.
There is a measurable threshold worth knowing. On most product pages, adding one credible proof clip in the first screen of the gallery produces a visible conversion lift; adding a fourth clip produces almost nothing. The gain comes from resolving the core objection once, decisively, near the top of the page rather than from volume of media. The channel sequencing of that asset is discussed in the digital marketing guide for waterproof bag brands.
Shoot the closure and the hardware, because that is what buyers doubt
When a waterproof product fails in the field, it usually fails at the closure, not through the fabric panel, and experienced buyers know this. A laboratory-tested fabric is irrelevant if the roll-top is awkward to align or the coated zipper is stiff to pull. Yet most galleries spend all their effort on the panel and none on the closure, which is precisely where the doubt sits.
Closure photography has a specific structure: show the mechanism open, show the action, show it sealed, and show it being released. For a roll-top, that means the number of folds, whether the buckle clips across or down, and what the finished roll looks like from the side. For a coated zipper, it means the pull travelling the full length without catching, and the garage or flap that covers the end. For a magnetic or cam closure, it means the sound and the resistance, which only video can convey.
| Closure type | What to capture | Failure the shot prevents | Where to place it |
|---|---|---|---|
| Roll-top with side buckle | Three folds, buckle clipped, profile view of the finished roll | Buyers who cannot work out how many folds are needed | Immediately after the hero evidence frame |
| Roll-top with top clip | The roll being compressed and the clip closing across | Under-rolled bags that leak at the top | Mid-gallery and in the care block |
| Coated or water-resistant zipper | Full travel of the pull, the end garage, the teeth in macro | Expectation that it behaves like a dry bag | Next to the rating statement |
| Clip or cam buckle | One-handed opening and closing, audible click in video | Doubts about whether it stays shut under load | Near the load specification |
| Hook-and-loop or flap | The coverage area and the seal line under spray | Assuming a flap gives the same protection as a seal | In the boundary or limits block |
Hardware deserves the same treatment. Buckles, D-rings, ladder locks and webbing attachment points are where a cheap product reveals itself, and a macro frame showing a clean moulding with no flash and a properly bar-tacked webbing attachment does more for perceived quality than any lifestyle frame. Two or three such details, captioned with what they are and what load they carry, justify a price premium against a competitor whose listing has none.
Closure and hardware imagery also has a second life on the wholesale side. A buyer evaluating a range cannot handle every sample, and macro construction detail in a line sheet substitutes for part of that handling. That is why these frames should be shot at high resolution even when the store only needs a small file, a point developed further in the section on reusing assets for B2B sell-in below and in the B2B sales conversion guide.
Colour accuracy on coated fabric: the silent return driver
Coated and laminated fabric behaves differently from ordinary textile under different light sources, and the discrepancy lands as a return rather than as a complaint. A shade that reads as a confident slate grey under studio strobe can read as blue-black on a phone screen in daylight, and a colour described as olive can arrive looking closer to khaki. Buyers rarely say “the colour rendering was inaccurate”; they select “not as described” or “changed my mind”, and the cost lands in the returns line.
- Shoot the production sample, never the prototype: coating formulation, laminate thickness and dye lot all shift between them.
- Capture one frame in daylight and one under the indoor lighting your customer actually shops in, and publish both.
- Include a written colour description next to the swatch, because words resolve ambiguity that images create.
- Use a grey card or a colour checker in the first frame of each setup so white balance is repeatable across shoots.
- Avoid heavy saturation or contrast grading on product frames; grade the lifestyle frames if you like, but leave the product honest.
- Re-shoot core colour frames whenever the fabric supplier or the coating changes, not only when the design changes.
Colour consistency across a range is a manufacturing question as much as a photographic one, and photography is where the problem becomes visible. If a five-colour range is shot on three different days with three different white balances, the grid on a collection page will look incoherent even if every unit is within tolerance. Standardise the setup once, record it, and reuse it.
Where colour is a brand asset, the tolerance question should be raised with the supplier before the shoot rather than after it, because re-shooting a range to hide a production inconsistency costs more than agreeing a tighter tolerance. The measurement side is covered in the colour matching and tolerance guide, and matching brand colours is treated in the Pantone customisation guide.
One shoot day, three channels: build the reuse layer in
The most expensive habit in this category is shooting separately for each channel. A DTC shoot, a marketplace shoot and a wholesale shoot usually produce roughly eighty per cent identical images at three times the cost, and then drift apart in claim language because three teams wrote three captions. Planning one shoot against a shared asset list is cheaper, faster and safer, and it is the difference between a photography budget that scales and one that resets every season.
| Channel | What it needs from the same shoot | Format and crop | Risk if shot separately |
|---|---|---|---|
| Own store product page | Evidence sequence, scale frames, detail macros, honest colour | Large, uncropped masters plus responsive derivatives | None if it is the primary shoot |
| Marketplace listing | Clean pack-shots on white, one or two proof frames, infographic overlays | Square, high resolution, strict background rules | Gallery drifts in colour and the claim wording differs |
| Paid social and email | Three-second proof clip, vertical crop, one strong still | Vertical 9:16 and square, captioned for mute | Creative is cut from the wrong crop and looks amateur |
| Wholesale line sheet and B2B page | Construction macros, size family shot, colourway grid | Print-resolution stills, neutral background | Buyers receive lifestyle images and cannot assess construction |
| Retail sell-in and packaging | One hero frame, one cutaway, small detail inset | CMYK-safe files with bleed allowance | Packaging art is re-shot late and misses the print window |
| Support and care content | Closure operation frames, drying and re-proofing stills | Small files, clear captions | Customers receive instructions with no imagery at all |
Practical discipline makes this work. Shoot the widest useful framing and the highest resolution you can store, keep masters uncut and ungraded, name files with a convention that includes style, colourway, shot type and date, and record usage rights in a simple register. Then produce channel derivatives from the masters rather than re-shooting. The register matters because a marketplace infographic, a paid creative and a retail sell sheet must all state the same waterproof level; the fastest way to create a compliance problem is to let three teams write that sentence independently.
Governance should also cover refresh triggers. Re-shoot when the construction, material, hardware or colour changes, and refresh lifestyle frames roughly annually so the brand does not look abandoned. Everything else can be recombined. That is precisely why a library reduces marginal cost per campaign over time, and why the first shoot should be scoped as a library build rather than as a set of product images.
Lighting setups that survive both matte and coated surfaces
A waterproof range usually mixes surfaces: matte-coated shell fabric, glossy TPU windows, metal hardware and webbing. One lighting setup has to handle all of them, which rules out both a single hard source and a completely flat, shadowless tent. The working compromise is large, soft, angled key light with controlled fill and a reflector placed to keep the specular highlight off the most important curve of the product.
- Key light large and at roughly forty-five degrees, far enough back that the highlight does not clip on coated panels.
- Fill at low power on the opposite side, enough to keep shadow detail but not enough to flatten the form.
- A black flag or negative fill on one side to restore shape where a fully lit tent would make the bag read as a blob.
- A separate small, gridded source for hardware and macro detail, since metal needs a harder light than fabric does.
- A polarising filter on the lens for coated fabric, accepting the light loss and compensating with power or exposure.
- A fixed, documented setup so the next shoot matches this one; repeatability is worth more than any single improvement.
Camera settings should favour depth of field over speed for detail work. Product frames generally want a small aperture so the whole bag is sharp, which means a tripod, tethered capture and no reliance on handheld shutter speeds. For macro hardware frames, focus stacking is usually unnecessary; a single frame at f/8 to f/11 with adequate light is sufficient and much faster to process at range scale.
Shoot tethered where possible. Reviewing frames on a calibrated screen at full size catches highlight clipping, colour drift and dust on a coated panel while the setup is still standing. Reviewing on a camera back is how a range gets shot, packed up and discovered to be unusable three days later, which is the most common and most avoidable cost overrun in product photography.
Marketplace image rules versus your own store
Marketplace image requirements are not aesthetic preferences; they are enforced constraints, and a listing that violates them is suppressed or rejected regardless of how good the photography is. Pure white backgrounds, a minimum pixel dimension, a maximum file size, a required number of images, and in many categories a prohibition on text overlays in the main image are typical. Your own store has none of these constraints, which is exactly why the two should not be shot the same way.
The efficient approach is to shoot once to the strictest standard and then relax. Produce clean, high-resolution, white-background masters that satisfy marketplace rules, then build richer store assets from the same session with different backgrounds and crops. Shooting the store assets first and trying to cut marketplace images out of them fails in the other direction, because a marketplace main image cropped from a lifestyle frame will be rejected and the reshoot costs more than doing it properly the first time.
- Confirm the current image specification for every marketplace you list on before the shoot; requirements change and differ by category.
- Shoot the main image separately from the gallery, with the product filling the frame to the permitted margin.
- Keep text overlays out of the main image and put specification overlays in secondary slots where they are allowed.
- Produce the zoom-capable resolution the marketplace wants, since zoom is a genuine conversion feature for technical products.
- Maintain one claim caption set so the listing, the store and the paid creative never state different performance levels.
Listing economics interact with photography in one specific way: the marketplace rewards images that reduce uncertainty because they reduce returns, and returns are disproportionately expensive there. A listing with proof imagery and scale references typically converts better at the same price, which compounds through the ranking system. The economics are analysed in the marketplace listing profitability guide.
Where a brand sells both direct and through a marketplace, avoid publishing identical galleries at different prices. Differentiate by configuration, bundle or colourway, and keep the claim language identical even when the imagery differs. Teaching a customer that the same product exists cheaper elsewhere is a marketing cost that no amount of good photography recovers.
Budget, staging and what a usable shoot actually costs
Photography budgets fail less from high day rates than from poor scoping. The costs that surprise founders are not the photographer; they are the sample preparation, the water handling and safety on wet sets, the reshoot when the production sample differs from the prototype, the retouching at range scale, and the file management nobody budgeted. A realistic budget starts from the asset list, not from the day rate.
| Scope tier | What you get | Indicative cost range | Right for |
|---|---|---|---|
| Founder shoot | Phone or entry camera, daylight, one evidence sequence per SKU, scale frames | Under USD 500 plus your time | First three SKUs, pre-launch validation |
| Studio half-day | Three to five SKUs, white pack-shots plus one evidence sequence each | USD 800 to 2,000 depending on market | A marketplace launch and a first own-store gallery |
| Full studio day with water set | Six to ten SKUs, evidence sequences, macros, colourway grid, one proof clip | USD 2,500 to 6,000 | A seasonal range launch across store and marketplace |
| Range shoot plus location day | Full range plus in-scene context and lifestyle, talent and travel | USD 6,000 to 15,000 | Established brands refreshing a full range annually |
| Ongoing retainer | Monthly asset production, seasonal updates, channel derivatives | USD 1,500 to 5,000 per month | Brands running continuous paid and content channels |
- Budget sample preparation: samples must be production units, steamed or shaped, and free of packing creases.
- Budget wet-set logistics: containment, drying time between takes, electrical safety, and a second unit while the first dries.
- Budget retouching per frame at range scale; a forty-frame shoot is forty files to process, not one batch.
- Budget a contingency of roughly fifteen per cent for reshoots, because one construction change invalidates a day.
- Budget file management and storage; masters are large and must survive to the next season.
Staging order matters on the day. Shoot everything dry first, because once the product is wet the rest of the day belongs to wet work. Then shoot the evidence sequences, which need the most takes and the most light adjustment. Then shoot macros and details, and finish with anything that can be done quickly while a unit dries. Ranges shot in a logical order produce more usable frames per hour than ranges shot reactively.
Sequencing against the supply calendar is the part most often missed. Photography needs production samples, which means the shoot sits after sampling and before bulk delivery, and bulk takes 35–50 days after sampling completes at 6–10 working days. A seasonal campaign therefore needs the shoot date set months before the spend curve rises, which is the planning logic in the custom order lead time guide.
A shoot-day checklist and the governance that keeps it honest
The difference between a shoot that produces a library and a shoot that produces a folder of unusable files is almost always preparation. Write the asset list before the day, map each frame to a channel and a purpose, and bring the claim sheet so nobody invents a specification on set. The following checklist reflects what actually goes wrong.
- Asset list agreed and mapped: each frame has a channel, a slot and a purpose before the camera comes out.
- Claim sheet on set: approved waterproof statement, test method, boundary conditions and prohibited words.
- Scale props packed for every size in the range, with the specific device models your customers actually own.
- Proof objects packed: paper towels, printed pages, spare devices that are not the ones you need afterwards.
- Production samples inspected and steamed; prototypes clearly labelled and kept out of the hero frames.
- Setup documented: light positions, distances, camera height, focal length, white balance and grey card reference.
- Tethered review station with a calibrated screen, checked for highlight clipping on every coated frame.
- Continuity discipline: the core claim is recorded uncut, and the uncut original is kept.
- File naming convention applied on the day, plus a same-day backup before anyone leaves.
- Caption bank written before the shoot, so claim language is approved rather than improvised.
Governance after the shoot is what keeps the library valuable. Assign an owner, keep a register of every asset with its licence, usage rights and expiry, and keep the approved-claims list next to it. When a marketplace listing, a paid creative and a retail sell sheet must all state the same waterproof level, the register is the mechanism that makes that true.
Claims made in imagery are claims like any other and must be substantiated before publication. Regulators in major markets expect a performance claim to be supported by evidence held before it is published, and the US Federal Trade Commission guidance for businesses and the European Commission consumer protection framework both reflect that principle. Practically, it means the test report, the method and the date must exist behind every performance frame you publish, and the photograph must illustrate the claim rather than exceed it.
Once the imagery is built, the next decision is whether the product behind it is differentiated enough to be worth photographing at all. Evidence cannot rescue an undifferentiated item; it can only make an existing advantage visible. When a brand is ready to control construction, materials and closure design rather than merely describe them, the practical route is custom development. Review the process from first enquiry through sampling into bulk production, then send a specification: minimum order quantity is 500 pieces per style, sampling takes 6–10 working days, bulk takes 35–50 days, quoted FOB Xiamen.
Frequently Asked Questions
Q1. Why is waterproof bag photography different from general bag photography?
Because the performance being sold is invisible. General bag photography can show shape, colour and styling, but a dry bag is bought to prevent something that has not happened yet. The gallery has to stage a demonstration with a visible result, not a pack-shot.
Q2. What is the single most important photograph on a waterproof bag listing?
A before, during, after sequence: the interior with a dry proof object, the bag under water or spray at stated conditions, and the interior opened afterwards with the object still dry. One continuous take is more convincing than three edited frames.
Q3. How do I stop coated fabric from looking like cheap plastic?
Enlarge and distance the light source so the specular highlight does not clip, use a circular polariser, angle the camera off the reflection axis, and shoot on a mid-tone sweep rather than pure white. Retouching a clipped highlight afterwards makes it worse.
Q4. Should product photography be shot on a pure white background?
White is required for marketplace main images and useful for variant comparison, but it is a hygiene asset, not a conversion asset. Dark coated fabric often looks better and more expensive on a mid-grey sweep that preserves edge definition.
Q5. How do I show the size of a bag that buyers cannot picture from litres?
Put a familiar object in the frame on every size variant: a smartphone, a fifteen-inch laptop, a one-litre or two-litre bottle, or a hand and forearm. Use the same focal length across the range so sizes stay comparable.
Q6. Is video worth the extra cost for waterproof products?
For the core claim, yes: a continuous clip removes the possibility of a frame swap. Keep it to six to twelve seconds with the result visible early, and always place a still of the result frame beside it for buyers who do not press play.
Q7. What should I photograph besides the outside of the bag?
The closure in operation, the seam or weld in macro, the hardware and webbing attachment, and the interior loaded with the device the buyer is protecting. Closure photography matters most because that is where waterproof products actually fail.
Q8. How many images should a waterproof bag listing have?
Roughly four clean pack-shots per colourway plus three to five evidence and context frames. That satisfies marketplace requirements and carries a product page without a second shoot. Twenty lifestyle frames and two pack-shots is the usual misallocation.
Q9. Why do waterproof products get so many size-related returns?
Because litres are abstract and soft roll-top shapes change volume as they are rolled. Scale references, exact internal dimensions, the largest device that fits and a consistent focal length across the range remove most of those returns.
Q10. How much does a waterproof bag product shoot cost?
A founder shoot with a phone and daylight can be under USD 500. A studio half-day covering three to five SKUs runs roughly USD 800 to 2,000. A full studio day with a wet set and proof clips typically runs USD 2,500 to 6,000, before location or talent.
Q11. Can I reuse the same photographs for my store, a marketplace and wholesale buyers?
Yes, and you should plan for it. Shoot the highest resolution and the widest framing, keep uncut masters, then produce channel derivatives. Shooting each channel separately triples cost and lets claim language drift between them.
Q12. When should the shoot happen relative to production?
After production samples exist and before bulk delivery. Sampling takes 6–10 working days and bulk takes 35–50 days, so a seasonal campaign shoot must be booked months before the advertising spend curve rises.
Q13. Do I need to test the product before photographing the test?
Yes. Any performance claim shown in imagery must be supported by evidence held before publication, including the method and the date. Photograph the claim you can substantiate rather than the strongest claim a buyer would accept.
Q14. How do I keep colour accurate on coated and laminated fabric?
Shoot the production sample rather than the prototype, use a grey card, capture one daylight and one indoor frame, avoid heavy saturation grading on product frames, and write a colour description next to the swatch.
Q15. What is the most common expensive mistake in this kind of shoot?
Shooting lifestyle before evidence, and reviewing frames on a camera back instead of a calibrated screen. Both produce a folder of attractive images and nothing that resolves the buyer’s actual objection.
Q16. Should I photograph a product with spray resistance as if it were submersible?
No. Stage a shower or spray test at a stated rate and duration instead. Showing a submersion test on a product rated only for spray creates both a returns problem and a compliance problem.
Q17. How often should a waterproof range be re-shot?
Re-shoot core evidence whenever construction, material, hardware or colour changes, and refresh lifestyle frames roughly annually. Everything else can be recombined from the existing library, which is why governance and file naming pay back over time.
People Also Ask
How do you photograph a waterproof bag?
Shoot the demonstration, not the object: a before, during and after sequence with a dry proof object inside and the conditions stated in the caption.
Why does coated waterproof fabric look cheap in photos?
Specular highlights clip to pure white on TPU and PVC surfaces. Use a larger, more distant light source, a polariser and an off-axis camera angle.
Should product photos be white background or in scene?
White for marketplace comparison and variant grids, in-scene wet context for the product page. Each answers a different buyer question.
How do I show bag size in photos?
Place a familiar object in frame — phone, laptop, drinks bottle or a hand — and use one focal length across the whole range.
Is video better than stills for waterproof products?
Video proves continuity for the core claim; stills win for scanning and marketplaces. Use both, with a still of the result frame beside the clip.
How many photos does a waterproof bag listing need?
About four pack-shots per colourway plus three to five evidence and context frames, including closure operation and scale references.