Ink does not stick to a waterproof coating for the same reason water does not: the surface is engineered to have low surface energy. A durable water repellent finish, a silicone face or a fluorinated topcoat works by refusing to wet out, and an ink film is a liquid that has to wet the surface before it can bond to it. That contradiction is the whole subject, and it is why printing is the decoration process that fails most often on waterproof bags while being the one everyone assumes is simple. Every remedy — corona, flame, plasma, primer, or a matched ink system — is a way of buying surface energy back, and each one comes with a cost, a decay time and a side effect on the very water repellency the coating was there to provide.
This guide covers why printing is specified last and fails first, the surface energy contradiction in numbers, what a dyne reading does and does not tell you, the ink systems and how each one bonds, which decoration route suits which coating, the pretreatment options and their trade-offs, why cure parameters are the most common silent variable, how to run an adhesion test that means something on a stretchy coated shell, why prints crack at folds rather than on flat panels, what wash and rub fastness actually predict, the specific problems prints cause on welded constructions, what getting it right costs against what getting it wrong costs, and the specification block that makes adhesion a requirement rather than a hope. QUANZHOU JUNYUAN BAGS — custom waterproof bag production since 2014, 4,950 m² SGS-verified facility — works to MOQ 500 pieces per style, with sampling in 6–10 working days and bulk in 35–50 days, FOB Xiamen.


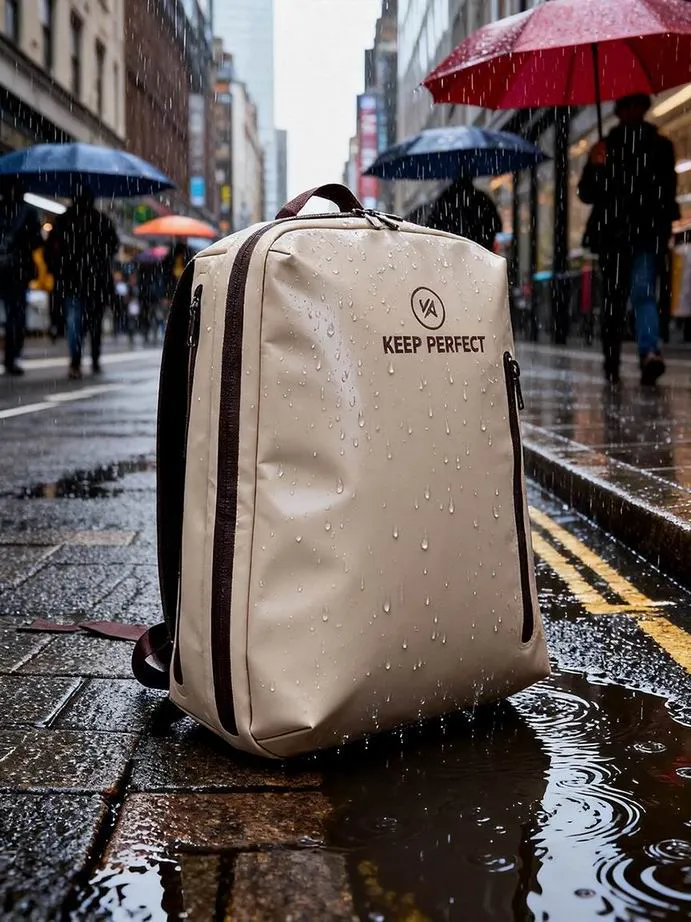
Why printing is specified last and fails first
On any waterproof bag programme the artwork is approved after the material, the construction and the colourway have been settled, and usually after the first samples exist. By then the coating is fixed, the weld parameters are validated and the fabric is on order, and the print has to be made to work on a surface that was selected without reference to it. Everything about ink adhesion on coated fabrics follows from that sequencing problem: waterproof bag printing is the only process on a bag where the substrate is chosen by someone else, and it is the reason adhesion failures look sudden even though they were decided months earlier.
The second reason failures arrive late is that the approval test is unrepresentative. A print is approved by looking at a flat, new, unwashed sample in good light, and the ways prints actually fail are folding, stretching, washing, rubbing and ageing. None of those is present at approval. A logo that survives sign-off can crack at a roll-top crease within a month, and the crack appears at exactly the place the customer looks most often, which is why print complaints feel disproportionate to the size of the defect.
The third reason is economic and it is the one that should change how buyers sequence things. Once a bag is assembled, a bad print cannot be repaired. Ink cannot be stripped from a coated shell without destroying the coating, so a print defect found after assembly turns a finished bag into scrap, whereas the same defect found at the print stage costs a panel. That asymmetry makes print validation the highest-return check in the whole process, and it is routinely skipped.
- The coating is selected before the print system, so the substrate is never chosen with adhesion in mind.
- Approval happens on a flat, new, unwashed sample, while the failure modes are fold, stretch, wash, rub and age.
- A print defect found after assembly is scrap, because ink cannot be removed from a coated face without destroying it.
- Decoration is the most visible element on the product, so its failures generate the loudest complaints.
The contradiction in numbers: low surface energy versus wetting
For a liquid to spread over a solid, the solid has to have a higher surface energy than the liquid’s surface tension. That is the entire rule, and it is why waterproof coatings and printing are in direct conflict. The rule of thumb used in production is that the substrate should sit roughly ten millinewtons per metre above the ink’s surface tension, because wetting is necessary but not sufficient and the margin covers contamination, roughness and the fact that an ink film also has to survive being stretched afterwards.
The numbers make the problem concrete. A fluorinated finish and a silicone face can sit below about 24 millinewtons per metre, sometimes well below. Polyethylene is around 31 and polypropylene around 29, which is why both need treatment before anything sticks to them. Untreated polyester is nearer 43. A polyurethane coating sits broadly in the high thirties to the mid forties depending on formulation, and a properly corona-treated polyolefin can reach the high forties or above. An ink formulated to sit in the low thirties will therefore wet a polyurethane face and refuse a silicone one, and no amount of additional pressure or additional heat changes that.
This is where the common misunderstanding lives. Buyers assume that if the ink will not stick, the answer is more heat or more pressure, and both make things worse: heat can drive low molecular weight additives to the surface, which lowers surface energy further, and pressure cannot overcome a thermodynamic refusal to wet. The answer is either raising the surface energy of the substrate or lowering the surface tension of the ink, and both are formulation decisions rather than press settings.
The interaction with the coating’s own function is worth stating plainly because it is the trap in every remedy. Whatever raises surface energy also reduces water repellency locally. A corona pass raises the surface energy of the printed area and makes that area wet out more readily. The printed patch is therefore the least water-repellent part of the shell, which is harmless on a vertical panel and genuinely problematic if the printed area is somewhere that sits in water. This is the trade-off, and it is the reason pretreatment should be specified deliberately rather than applied by default. The finishes themselves are described in our guide to DWR, polyurethane and silicone coatings.
Dyne readings: how to take one, and why they mislead
The dyne test is the standard shop-floor check and it is genuinely useful, provided its three limitations are understood. A dyne pen or a set of dyne solutions of known surface tension is applied to the surface, and the highest value that stays as a continuous film for two seconds rather than beading up is the wetting tension. It is fast, cheap and good enough to catch a bad batch. It is also not a measurement of surface energy, not stable over time, and not a prediction of adhesion.
| Limitation | What actually happens | Why it misleads | What to do instead |
|---|---|---|---|
| It measures wetting tension, not surface energy | The result depends on the specific test liquid and on surface roughness and additives | Two surfaces with the same dyne reading can behave differently with the same ink | Use contact angle goniometry for anything contentious; use dyne only as a pass or fail gate |
| Readings drift with age and storage | Dyne solutions and pens lose strength over a few months, and the result drifts with temperature | A pen that reads high makes a marginal surface look acceptable | Date the pens, store them as directed, and replace them on a schedule rather than when they run out |
| The surface changes after manufacture | Additives bloom to the surface in the days and weeks after coating, lowering surface energy | A fabric that read 42 at the mill can read the mid thirties by the time it is printed | Measure at the print station immediately before printing, not at goods receipt |
| Treatment decays | Corona and flame effects fade over hours to days as surface groups reorient and migrate | A treatment validated on Monday can be gone by Friday | Define a print window after treatment and write it into the process instruction |
| A pass does not guarantee adhesion | Wetting is necessary but not sufficient; mechanical keying, cure and film strength matter too | A surface can wet beautifully and still let the film peel under stretch | Follow the dyne gate with a cross-hatch and a stretch test |
The third row is the one that generates the most confusion in practice, because it produces a situation where nobody is at fault. The fabric certificate shows a good figure, the printer measures a poor one, and both are correct: the surface has changed since it was made. Additives that bloom, slip agents added by the mill to stop rolls blocking, and silicone contamination from an earlier process in the same factory all lower surface energy after the fact. Measuring immediately before printing, and wiping with a solvent compatible with the coating when a bloom is suspected, resolves most of these cases for the cost of a pen.
One specific contamination deserves its own warning because it is invisible and persistent. Silicone, whether from a finish, a spray, a mould release or a grip pattern printed earlier in the same facility, spreads at trace levels and defeats adhesion on everything it reaches. It is the classic cause of a print failure that appears random across a batch. Where silicone is used anywhere in the same building, the print area needs to be physically separated, and the same warning applies to the grip treatments discussed in our guide to anti-slip base textures.
Ink systems: how each one actually bonds
Inks do not all attach the same way, and the bonding mechanism determines which coating each can work on. Broadly, an ink either dissolves into and fuses with the surface, mechanically keys into it, sits on top held by an adhesive layer, or diffuses into the polymer. Each has a different relationship with a waterproof coating.
| Ink system | Bonding mechanism | Elongation of the cured film | Suitability on a waterproof face | Principal risk |
|---|---|---|---|---|
| Solvent-based polyurethane or acrylic | Partially dissolves the coating surface and fuses with it; the strongest bond available | Good; flexible grades are available | The default choice for polyurethane and TPU faces | Solvent can attack the coating if too aggressive, and residual solvent contributes odour |
| Plastisol | Sits on the surface and fuses into a continuous film with mechanical keying | Moderate to good with stretch additives; poor without them | Excellent on PVC; unreliable on polyurethane and TPU | Plasticiser migration in both directions, and restricted-substance issues in some markets |
| Water-based acrylic | Coalesces into a film, bonding mainly by keying and polar interaction | Good | Works on higher energy faces; weak on silicone and fluorinated finishes | Lower wash and rub fastness unless a crosslinker is used and fully cured |
| Ultraviolet-curable acrylate | Crosslinks in place with very little penetration | Poor; often only a few tens of per cent at most | Good on rigid panels and flat labels; poor anywhere that folds | Cure shrinkage builds internal stress and the film cracks at the first real fold |
| Heat transfer film | A pre-made film bonded by a hot-melt adhesive layer | Depends on the film; usually good | Good where the adhesive is matched to the face | Edge lift if surface energy is low or press parameters are wrong |
| Dye sublimation | Dye diffuses into the polymer and is locked in on cooling | Not applicable; there is no film | Requires a polyester surface; does not work on a coating it cannot diffuse into | On a coated face the dye sits in the coating, migrates and washes out, giving poor fastness |
The sublimation row is worth expanding because it is the most commonly misapplied process in this category. Sublimation printing is superb on polyester because the dye genuinely enters the fibre and becomes part of it. On a bag with a continuous polyurethane or TPU face, there is no fibre to enter: the dye dissolves into the coating instead, and then does what anything dissolved in a coating does, which is migrate. The result is a print that looks excellent on day one and bleeds, fades or transfers onto whatever it touches within a season.
The plastisol row has the same shape of problem in reverse. Plastisol is formulated around a polyvinyl chloride particle in a plasticiser, and it bonds beautifully to PVC because the two are chemically kin. On a polyurethane face it is a foreign film sitting on a surface it cannot fuse with, and it will hold only as long as the mechanical key holds. Where a programme wants the thick, opaque, high-build look of plastisol on a polyurethane shell, the honest answer is a flexible polyurethane ink with a white underlay, not plastisol with a stretch additive.
Decoration routes on a coated shell, and what each one costs the design
Beyond the chemistry, the route chosen changes what can be printed, where it can be placed, and how it behaves afterwards. The route is frequently decided by the artwork rather than by the material, which is backwards.
- Screen printing: the workhorse. High opacity, good durability, economical at volume, and each colour is a separate screen. It puts down a thick film, which is both its strength and the reason it cracks at folds.
- Heat transfer: good for small runs and multi-colour artwork, and the film can be positioned precisely. It adds a layer with edges, and edges are where it fails.
- Digital direct printing: no screens, good for short runs and complex images, and it generally needs a pretreatment and a carefully controlled cure on a coated face.
- Woven label, patch or badge: the safest route of all on a difficult surface. It is attached mechanically, so surface energy is irrelevant, and it is the answer whenever adhesion cannot be made reliable.
- Embroidery: mechanically attached and therefore immune to the adhesion problem, but it perforates the barrier and every needle hole has to be sealed afterwards.
- Debossed or welded badge: no ink at all, and the only route that adds no failure mode beyond the bond to the shell.
The last three rows are the ones worth remembering as a fallback. When a coating genuinely will not accept ink reliably, the answer is not to keep changing inks; it is to change the decoration method so that adhesion stops being the mechanism holding the logo on. A sewn or welded badge costs more per unit than a screen print and eliminates an entire category of complaint, which is often the right trade on a premium product. The full set of options and their constraints is covered in our guide to custom logo options.
Artwork constraints matter here too, and they are cheapest to resolve before the file is sent. Very fine detail, very large solid areas and heavy ink coverage all increase film thickness and therefore cracking risk, and a solid block placed across a known fold line will fail regardless of which ink is used. Our piece on preparing design files for production sets out what to supply so that the printer can flag these before tooling rather than after.
Pretreatment: buying surface energy back, and what it costs
When the ink cannot be reformulated, the surface has to be changed. Four routes are available and they differ in cost, in how long the effect lasts, and in how much damage they do to the coating underneath.
| Pretreatment | How it works | How long the effect lasts | Risk to the waterproof coating | Best use |
|---|---|---|---|---|
| Corona discharge | An atmospheric discharge oxidises the surface and raises its energy | Hours to days, and it decays faster on rough or additive-rich surfaces | Low if controlled; over-treatment can chalk or emboss the face | Flat panels printed soon after treatment; the default for film and coated webs |
| Flame treatment | A brief controlled flame oxidises the surface | Similar to corona, sometimes longer | Real risk of scorching or softening a thermoplastic face if dwell is too long | Three-dimensional shapes where a corona head cannot reach uniformly |
| Atmospheric plasma | A cold plasma gives the most uniform and highest energy surface | Longer than corona, but still finite | Lowest risk of the four when parameters are right | Difficult surfaces and programmes where adhesion has already failed |
| Chemical primer or adhesion promoter | A thin tie coat formulated to bond to both the coating and the ink | Permanent, because it stays on the part | Can alter gloss and hand feel, and must be compatible with the coating | Where a durable bond is needed and a process step is affordable |
| Solvent wipe | Removes bloom, slip agent and contamination | Minutes to hours; the surface returns to its previous state | Can strip part of the finish if the solvent is too aggressive | As a diagnostic and a short-term fix, never as the control |
The decay column is the one that causes production failures. A factory treats a batch on Monday, the print schedule slips, and the panels are printed on Thursday at a surface energy that has already fallen back below what the ink needs. The control is simple and should be written into the process instruction: define the maximum time between treatment and printing, and re-measure at the press. That single line prevents a failure mode that otherwise looks like random batch variation.
The primer row is the most robust and the least used, largely because it adds a step and a cost. Where a programme has a genuinely difficult surface — a silicone-coated nylon being the classic example, discussed in our review of silicone-coated nylon — a matched primer is often the only reliable answer, and it is cheaper than the rework it prevents. The important condition is that the primer must be specified as a system with the ink, because a primer designed for one ink family will not necessarily help another.
Cure: the parameter nobody records
Adhesion failures are blamed on inks and on surfaces far more often than they should be. In a large share of cases the ink and the surface were fine and the film was never properly cured. Cure is a three-variable process — temperature, time and, for some systems, dose — and the variable that matters is the temperature of the film itself, not the setpoint on the oven display.
- Under-cured solvent and water-based systems look perfect and fail in the first wash, because the solvent or water has left but the binder has not coalesced or crosslinked.
- Under-fused plastisol looks glossy and smooth but has not reached its fusion temperature, and it will wash off or crack almost immediately.
- Over-cured films become brittle, yellow, and can scorch a heat-sensitive coating underneath.
- Insufficient ultraviolet dose leaves unreacted monomer in the film, which is both a fastness problem and an odour problem.
- Line speed is the hidden variable: raising throughput to hit a schedule silently reduces dwell time at the same indicated temperature.
The control that works is to measure at the film rather than at the machine, using a temperature indicator strip or a probe on the actual print, and to record the result against the batch. It costs almost nothing and it converts the most common cause of adhesion failure from an argument into a record. Where a crosslinker is part of the system, the pot life of the mixed ink matters in exactly the same way it does for coatings, and the same discipline applies.
There is also a sequence issue that belongs here. If a bag is welded after printing, the weld station puts heat into the print area, and a print that was correctly cured can be overcooked by a weld cycle or by a seam-taping pass that runs over it. Wherever decoration and welding are close together on the panel, the print has to be validated against the full process sequence rather than against the dryer alone.
Testing adhesion on a stretchy coated shell
The standard cross-hatch tape method, described in the ASTM International and ISO paint and varnish series, cuts a lattice through the film, applies a defined tape and rates how much is removed. It is an excellent method on rigid substrates and an unreliable one on a coated textile, and knowing why saves a lot of false confidence.
| Test | What it measures | Problem on a coated fabric | How to make it useful |
|---|---|---|---|
| Cross-hatch with tape | Resistance of the film to being pulled off in small squares | The cutting and the tape pull deform a soft substrate, and the fabric itself can fail rather than the bond | Use it as a coarse gate only; report the rating with the spacing and the tape type |
| Stretch and tape | Adhesion under the strain the product will actually see | It is not a standard, so it has to be defined by the buyer | Stretch to a defined strain, hold, release, then tape. This is the test that predicts field cracking |
| Crock or rub fastness | Resistance to colour transfer under rubbing | Measures colour transfer rather than film removal | Run wet and dry, and rate both the print and what it was rubbed against |
| Wash fastness | Resistance to laundering or immersion | Detergent and temperature both attack the film and the bond | Define the cycle, the temperature and the detergent, then rate appearance and adhesion |
| Fold or crease test | Whether the film survives the tightest fold in the design | Not standardised for this product, so it is rarely run at all | Fold the printed panel around a mandrel of the radius the design uses and inspect under magnification |
The fold row is the one that predicts the complaint, and it is almost never run. The physics is simple: when a laminate of thickness t is bent to a radius R, the strain on the outer face is roughly t divided by twice R. A half-millimetre laminate folded to a one-millimetre radius therefore puts about twenty-five per cent strain on the outer surface, which is far more than a flat panel ever sees and far more than a brittle ultraviolet-cured film can take. Any printed area that crosses a fold must be validated at that radius, not on the flat.
A practical and cheap protocol for most programmes is therefore four steps: a dyne gate at the press immediately before printing, a cure record at the film, a cross-hatch on a coupon, and a stretch-and-fold check on the actual panel at the tightest radius in the design. That sequence catches essentially every failure mode discussed in this article, and none of it requires a laboratory. Where a formal result is needed, the colour fastness methods published by the American Association of Textile Chemists and Colorists give comparable numbers, and the interpretation of them is set out in our guide to colour fastness testing.
Why prints crack at folds rather than on flat panels
Cracking is the most visible print failure and it is a strain problem, not a bonding problem. The bond can be perfect and the film will still crack if it cannot stretch as far as the surface it is stuck to. Three variables decide it: the elongation of the cured ink film, the thickness of the film, and the radius of the tightest fold the printed area has to survive.
- Film elongation must exceed the substrate strain at the fold, with a margin. A brittle crosslinked film that reaches a few tens of per cent will crack where a flexible polyurethane film of several hundred per cent will not.
- Thickness compounds it: strain at a fold rises with total thickness, so a heavy white underlay plus two colour layers is several times more crack-prone than a single thin layer.
- Placement decides it: the same print survives on a flat front panel and fails across a roll-top crease, a lid fold or the corner of a base panel.
- Age makes it worse: plasticiser loss, ultraviolet exposure and hydrolysis all reduce the elongation of the film over time, so a print that passed at sampling can crack in year two.
- Cold makes it worse again: most ink films stiffen at low temperature, so a bag sold into a cold market needs a larger margin than one sold into a temperate one.
The design answer is unglamorous and effective. Keep heavy coverage off fold lines. Where artwork must cross a fold, reduce the film thickness by using fewer layers rather than by trying to make each layer more flexible. And where the print has to sit on a roll-top closure, which is the single most punishing location on any bag, consider moving it, because no ink system is comfortable folding at the same crease several times a day for years.
There is a related appearance failure that is often reported as cracking and is not: crazing in the coating underneath the print. A brittle topcoat under an otherwise sound ink film will craze at the fold and the print will follow the crack, and the remedy is in the coating specification rather than the ink. The mechanism is described in our review of exterior coatings and finishes.
Wash, rub and abrasion: what each result predicts
Three durability tests get quoted in this category and they predict different things, which is why a print can pass one and fail in service. Understanding which result predicts which complaint is what makes the testing worth paying for.
- Dry rub or crock predicts how the print survives handling and contact with clothing, and it catches the most common complaint of all, which is a logo rubbing off at strap contact points and pocket edges. Every programme should require it.
- Wet rub predicts how it survives wiping, rain and damp handling, and it catches transfer onto hands and clothing when the bag is wet. Require it for any bag sold into wet duty.
- Wash or immersion fastness predicts how it survives laundering and, indirectly, how well the film was cured. Under-cure shows up here first, which makes it a useful diagnostic as well as a requirement.
- Abrasion cycling predicts how it survives repeated friction over a long period, and it catches wear on base corners and strap contact zones. Require it for technical programmes and for anything printed on a wear zone.
- Ultraviolet exposure predicts how the colour survives sunlight, and it catches fading and shift, particularly in bright reds and blues and on pale colourways with a dark print. Require it for outdoor programmes.
The wet rub row is the most under-specified and the most informative, because wetting the surface both lubricates the contact and plasticises the film. A print that passes dry and fails wet is a reliable sign of marginal adhesion or incomplete cure, and the gap between the two results is more diagnostic than either result alone. Requiring both is a small addition to a specification and it catches a large share of latent failures.
Placement is the cheapest control of all and it belongs with the testing rather than instead of it. Prints on high-friction zones fail first: strap contact patches, base corners, handle wraps and anywhere the bag rubs against clothing. Moving a logo a few centimetres often does more for durability than upgrading the ink, and it costs nothing. Where a brand insists on placement in a wear zone, accept that the print is consumable and say so in the specification rather than treating the wear as a defect.
Prints on welded constructions: the four specific problems
A welded bag adds four failure modes that do not exist on a stitched one, and all four are avoidable if the print is considered during pattern design rather than after it.
- Bridging a weld: a print across a welded joint behaves exactly like a stiff tape across it. The joint flexes and the film cracks, taking the surface of the coating with it in some cases.
- Heat from the weld station: a print that was correctly cured can be damaged by the heat of a later welding or taping operation passing over or near it.
- Bridging a fold: on a packable or roll-top design the fold line moves, and a print crossing it will fail even if it was clear of every seam.
- Reduced weld quality under the print: a thick ink film in the weld area changes how the stack heats, and the joint underneath can be weaker than the validated parameters assumed.
The same clearance rule that protects reflective trim protects print: keep decoration clear of welded, taped and folded lines, and split artwork either side of a joint rather than across it. Written onto the pattern as a dimension, that one line removes most of these. Where a design genuinely requires artwork across a seam, the honest options are to move to a mechanically attached badge, or to accept a defined replacement cycle.
There is also a sequencing decision worth making explicitly. Printing flat panels before assembly is faster and cheaper and gives better registration, but it exposes the print to every later process. Printing after assembly avoids that but is slower, harder to register on a three-dimensional bag, and puts heat near finished seams. Most programmes print before assembly, and the consequence is that the print must be validated against the whole downstream sequence rather than against the dryer. Our overview of common waterproof bag defects places these in the wider defect picture.
What getting it right costs, and what getting it wrong costs
Printing itself is cheap. Pretreatment, better inks, a primer and a proper validation sequence add modest amounts per unit. The asymmetry is on the other side: a print failure discovered after assembly is a total loss on every affected unit, because there is no way to remove ink from a coated shell without destroying the coating underneath. That asymmetry is the whole commercial argument for spending slightly more at the front.
- Screen printing is economical at volume, with each colour adding a screen and a pass; the cost driver is artwork complexity rather than the ink.
- Solvent-based polyurethane inks cost more than commodity plastisol and are usually the right choice on a polyurethane or TPU face, because the alternative is rework.
- Pretreatment adds a process step and, for corona, a capital item; plasma is the most expensive and primer adds both material and labour.
- Validation — dyne gating, cure records, cross-hatch, stretch and fold, wet and dry rub — costs a few hours per programme and is the cheapest insurance available anywhere in this process.
- A mechanically attached badge costs more per unit than a print and removes the failure mode entirely, which is often the right trade on a premium or technical product.
The comparison that should drive the decision is not price per print but cost per accepted unit. A print that costs a few cents less and fails on one unit in fifty is far more expensive than one that costs slightly more and never fails, because the failure lands after the bag is finished and cannot be reworked. Where a programme is being value-engineered, printing is one of the worst places to save, precisely because its failures are terminal rather than repairable.
There is one ordering constraint to plan around. Because the ink system, the pretreatment and the coating have to be validated together, and because the coating is ordered in roll lots, the print specification has to be settled at sampling. Changing the decoration after the fabric has landed can invalidate the validation and there may be no compatible ink for the surface that was bought. The practical rule is to lock artwork, ink system and surface together in the same sampling round.
If you want both specified against each other rather than sequentially, send the artwork, the shell material and the duty environment, and the print route can be proposed as part of the same decision. You can see how a programme moves from first enquiry through sampling into bulk production, and every style starts at 500 pieces minimum, with samples in 6–10 working days and bulk in 35–50 days, quoted FOB Xiamen.
The print specification block
Everything above compresses into a short block that makes adhesion a requirement rather than an outcome. Written this way, the print stops being the last thing decided and becomes something a supplier can quote and a buyer can reject against.
- Surface: named coating chemistry and finish, with a minimum wetting tension measured at the press immediately before printing, not at goods receipt.
- Ink system: named chemistry, not a trade name, together with its surface tension and the elongation of the cured film.
- Pretreatment: which route, the parameters, and the maximum permitted time between treatment and printing.
- Cure: temperature measured at the film, dwell or line speed, and for ultraviolet systems the dose, recorded against the batch.
- Adhesion: cross-hatch rating with spacing and tape named, plus a stretch-and-tape result at a defined strain.
- Durability: dry and wet rub ratings, wash fastness with the cycle defined, and a fold test at the tightest radius in the design.
- Placement: drawn on the pattern with a stated clearance from every welded, taped and folded line.
- Change control: re-validation on any change of coating, ink, primer, colourway or supplier, and a retained reference sample from the first bulk lot.
The last two lines do the most work over the life of a programme. Placement prevents the failure modes that no ink can fix, and change control prevents the slow drift that turns a validated print into an unvalidated one. Both are free to write and both are far cheaper than the rework they prevent.
The block also changes the conversation with a supplier in a useful way. A printer asked to quote a logo will quote a logo. A printer asked to quote an ink system, a pretreatment, a cure record and four test results will either provide them or reveal that the surface and the artwork are incompatible before anything is cut, which is exactly the outcome a buyer wants.
Frequently Asked Questions
Q1. Why does ink not stick to waterproof fabric?
Because the coating is engineered to have low surface energy so that water will not wet it, and an ink film is a liquid that must wet the surface before it can bond. Silicone and fluorinated finishes sit below the surface tension of most inks, so the ink beads rather than spreading.
Q2. What surface energy does a substrate need for printing?
Roughly ten millinewtons per metre above the surface tension of the ink. A polyurethane face is usually in the high thirties to mid forties, while a silicone or fluorinated finish can be below twenty-four, which is below most inks and therefore unprintable without treatment.
Q3. Is a dyne pen reading reliable?
It is a useful gate and not a measurement. It indicates wetting tension rather than surface energy, the solutions degrade over months, and the reading changes after manufacture as additives bloom. Measure at the press immediately before printing.
Q4. Why did the fabric pass its certificate but fail at the printer?
Usually time. Additives bloom to the surface, slip agents migrate and contamination accumulates, so a surface that read well at the mill can read much lower weeks later. Both measurements were correct; the surface changed.
Q5. What is the best ink for a polyurethane or TPU face?
A flexible solvent-based polyurethane ink that partially fuses with the coating. Plastisol is formulated for PVC and will only sit mechanically on polyurethane, and ultraviolet-curable films are usually too brittle for anything that folds.
Q6. Can I use dye sublimation on a waterproof bag?
Only on an exposed polyester surface. On a continuous coating the dye dissolves into the coating instead of the fibre, then migrates and washes out, giving a print that looks excellent initially and fails within a season.
Q7. What does corona treatment do, and how long does it last?
It oxidises the surface and raises its surface energy. The effect decays over hours to days as surface groups reorient and additives migrate, so a maximum time between treatment and printing has to be written into the process.
Q8. Does pretreatment damage the waterproof finish?
It can. Raising surface energy locally reduces water repellency in that area, and over-treatment can chalk or scorch the face. Pretreatment should be specified deliberately, and printed areas avoided where the bag sits in water.
Q9. Why does my print look fine but wash off?
Almost always incomplete cure. Solvent and water may have left while the binder has not coalesced or crosslinked, and under-fused plastisol looks glossy and smooth without having reached fusion temperature. Measure temperature at the film, not at the oven.
Q10. How reliable is the cross-hatch test on coated fabric?
Less than on rigid substrates. Cutting and tape pull deform a soft substrate and the fabric can fail rather than the bond. Use it as a coarse gate and follow it with a stretch-and-tape test and a fold test.
Q11. Why does the print crack at folds but not on flat panels?
Because fold strain is much higher than flat strain. Outer-face strain in a bend is roughly the thickness divided by twice the radius, so a half-millimetre laminate folded to a one-millimetre radius sees about twenty-five per cent strain, which most ink films cannot take.
Q12. How do I stop prints cracking on a roll top?
Reduce film thickness by using fewer layers, keep heavy coverage off the crease, and where possible move the artwork. No ink system is comfortable folding at the same crease several times a day for years.
Q13. Should I test rub fastness wet as well as dry?
Yes, and the gap between the two is more informative than either result. Wetting lubricates the contact and plasticises the film, so a print that passes dry and fails wet is showing marginal adhesion or incomplete cure.
Q14. Can a print damage a welded seam?
Yes, in two ways. A print bridging a welded joint flexes against it and cracks it, and a thick film inside the weld area changes how the stack heats, weakening the joint below the validated parameters.
Q15. What is the safest decoration on a coated shell?
A mechanically attached woven label, patch or welded badge, because attachment is not dependent on surface energy. It costs more per unit and removes the entire adhesion failure mode.
Q16. Why can a bad print not be reworked?
Ink cannot be stripped from a coated face without destroying the coating underneath, so a print defect found after assembly turns a finished bag into scrap. This is why validation before assembly has such a high return.
Q17. When should the print system be specified?
At sampling, in the same round as the material. The coating is bought in roll lots, so changing the decoration after the fabric has landed can invalidate the validation and leave no compatible ink for the surface that was bought.
People Also Ask
Why will ink not stick to waterproof fabric?
Because the coating has low surface energy by design. Ink must wet the surface to bond, and silicone or fluorinated finishes sit below the surface tension of most inks.
What dyne level is needed for printing?
About ten millinewtons per metre above the ink surface tension. Polyurethane faces are usually high thirties to mid forties; silicone faces can be below twenty-four.
Which ink works on a TPU or PU face?
A flexible solvent-based polyurethane ink that fuses with the coating. Plastisol suits PVC and UV-cured films are usually too brittle for folds.
Why does the print crack at folds?
Fold strain is roughly thickness divided by twice the radius, so a tight fold puts far more strain on the film than a flat panel ever does.
Is cross-hatch testing reliable on fabric?
Only as a coarse gate. The substrate deforms during cutting and tape pull, so follow it with a stretch-and-tape and a fold test.
Can a bad print be fixed after assembly?
No. Ink cannot be removed from a coated face without destroying the coating, so a print defect after assembly is scrap.