Seam slippage is the movement of yarns within a woven fabric away from the stitch line, and it is the reason a waterproof bag can leave the factory with perfect seams and open up after a month of real loading. The mechanism is not thread breakage and it is not seam failure in the tensile sense. Under transverse load the warp or weft yarns slide past one another around the stitches, the stitch line stays intact, and a gap opens alongside it. Coating makes this dramatically worse, because a polymer layer reduces the inter-yarn friction that was holding the weave geometry in place. A shell that tests beautifully in hand feel can slip two or three times as much as the same base cloth uncoated.
This guide covers why coated and laminated shells slip more than the cloth underneath, what physically happens at the stitch line as yarns are drawn apart, the two EN ISO 13936 methods and why the fixed-load version is the one that predicts field behaviour, the hidden variable of temporary stitching before welding and the operator-to-operator variation that produces a twofold spread within one batch, why a new bag hides the defect completely until it is loaded, seam allowance width as the cheapest anti-slip lever available, interlining strips and reinforcement tapes and what each actually contributes, stitch density, thread tension and needle choice as the three machine settings that decide the outcome, why slippage and seam strength are different tests that rank constructions differently, acceptance criteria written in millimetres, where slippage becomes leaking, and the eleven specification lines that stop seams opening after sale. QUANZHOU JUNYUAN BAGS — custom waterproof bag production since 2014, 4,950 m² SGS-verified facility — works to MOQ 500 pieces per style, with sampling in 6–10 working days and bulk in 35–50 days, FOB Xiamen.
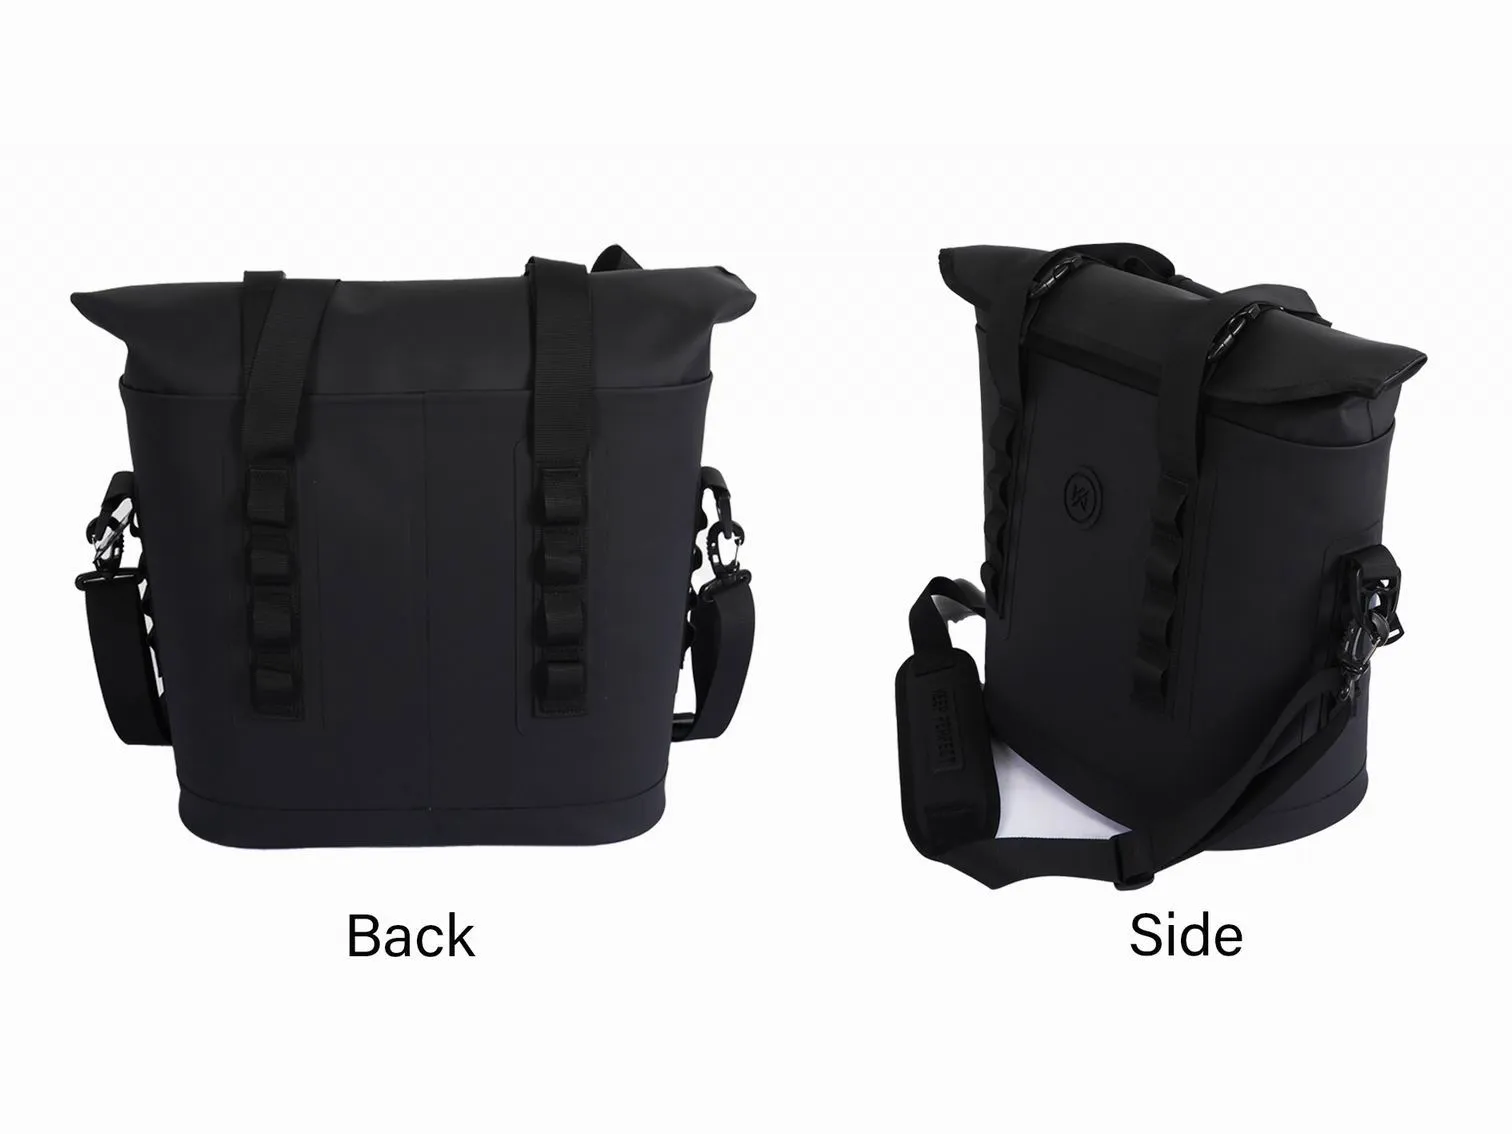


Coating and lamination make the shell slip more, not less
A woven fabric resists slippage through inter-yarn friction and through the mechanical interlocking of warp and weft at each crossing point. Every finish applied to that fabric changes that balance. A polymer coating fills the interstices between yarns, reduces the coefficient of friction between them, and in many cases locks the surface while leaving the interior structure free to move. The result is a shell that feels more substantial and slips more readily, which is counter-intuitive enough that it is routinely missed at material selection. Problems with seam slippage and with waterproof bag fabric shift are therefore worst on exactly the constructions that look most premium.
Three fabric variables dominate, and they interact. Thread count per unit length is the strongest single predictor: a low-count plain weave with loosely packed yarns has few crossing points per centimetre and slips easily, while a high-count weave has many and resists. Yarn surface character matters next, because filament yarns are smooth and slide past each other far more readily than spun or textured yarns. Weave type matters third: plain weave locks yarns at every crossing, while twill and satin constructions have long floats with few interlacings and slip considerably more for the same thread count.
This produces a specification trap that is worth naming. A buyer upgrading from a 210 denier plain weave to a heavier, smoother, higher-sheen fabric for a premium look is often simultaneously reducing the thread count and moving to a construction with longer floats. The fabric is stronger in tear and tensile terms and worse in slippage terms, and because slippage is not on the test schedule, the change ships.
- Coating reduces inter-yarn friction, which is the primary defence a weave has against slippage.
- Smooth filament yarns slip more than textured or spun yarns at the same count and denier.
- Twill and satin constructions have fewer interlacing points and slip more than plain weave.
- A laminated film face adds stiffness without adding inter-yarn friction, so it does not help.
What actually happens at the stitch line
Picture a seam loaded transversely, which is what happens when a bag is filled and the panels are pulled apart. The stitch line itself is strong; the thread does not break and the seam does not burst in the way a tensile test would show. Instead the load is transferred from one panel to the other through the stitches, and the stitches act as a row of pins pressing into the yarns. Because the load is applied at discrete points rather than across a continuous line, the yarns immediately adjacent to each stitch are pushed sideways. If the fabric can resist that sideways movement the geometry holds and the seam stays closed. If it cannot, the yarns slide back from the stitch line and a gap opens parallel to it.
The progression is gradual and that is what makes it dangerous. At low load the yarns move a fraction of a millimetre and elastically return. At higher load, or under repeated cycling, the movement becomes permanent: the weave structure has rearranged and does not spring back. Once a gap of one to two millimetres has opened along a seam, three consequences follow at once. The seam allowance is no longer doing its job, the waterproof tape or weld behind it is now spanning a gap it was not designed to span, and any water pressure at that point is applied directly to the seal rather than being shared with the fabric.
The visible symptom customers report is a seam that looks like it is smiling: a slight curved opening, usually at the point of maximum load, often at a corner or where a strap meets the body. It is frequently photographed and sent as a quality complaint, and it is frequently not a quality problem at all. It is a specification problem that was invisible at approval.
| Stage | What the yarns do | What the seam looks like | Is it recoverable? |
|---|---|---|---|
| Initial loading, below the slip threshold | Elastic deformation of the weave, no permanent rearrangement | Closed and normal | Yes, fully |
| At the slip threshold | Yarns begin to move past crossing points | Still closed to the eye | Partly; depends on duration |
| Sustained or cyclic load | Progressive rearrangement accumulates | A measurable gap, often 1 to 3 mm | No; the geometry has changed |
| Advanced slippage | Stitch line visibly distorted, yarns bunched at the ends | Open smiling gap, seal exposed | No; the seam needs rebuilding |
| Post-slippage leakage | Water reaches the seal directly | Wet interior at the seam | No; repair rather than adjustment |
EN ISO 13936: two methods and only one useful answer
The international method for this property is the ISO standard EN ISO 13936, Determination of the resistance to slippage of yarns at a seam in woven fabrics, and it has two parts that produce answers in opposite directions. Part 1 uses a fixed seam opening, typically six millimetres, and reports the force required to reach it. Part 2 uses a fixed load, and reports the resulting seam opening in millimetres. Both are legitimate and they are not convertible, and for bag work the second is the one that matters.
The reason is straightforward once stated. A buyer does not need to know how much force it takes to destroy a seam; the bag will never see that load in a tensile frame. What the buyer needs to know is how far the seam opens under a load the bag will actually see in service. Part 2 answers exactly that question in exactly the units that can be turned into an acceptance criterion. A specification written as "seam opening under a defined load shall not exceed X millimetres" is enforceable, arguable and testable. A specification written as "shall withstand Y newtons to a six millimetre opening" is a research result.
- Part 1, fixed opening: reports force in newtons to reach a set opening. Useful for comparing fabrics in a laboratory, poor as an acceptance rule.
- Part 2, fixed load: reports opening in millimetres at a set force. Directly usable as a purchase specification.
- Test both principal directions. Warp and weft slip differently, and a bag seam is usually loaded across one of them.
- State the seam construction in the test request, including allowance width and stitch density, because the result depends on both.
The seam strength test that most buyers already require is a different measurement entirely and is covered in our article on tear, tensile and burst testing. A fabric can pass seam strength comfortably and still slip badly, because strength measures what happens when the seam is destroyed and slippage measures what happens before that. The parallel method published by ASTM International is sometimes cited in quotations; insist on knowing which method produced any number you are given.
The hidden variable: temporary stitching before welding
Most welded waterproof constructions include a preliminary stitching step. The panels are tacked or basted together so they hold position while they are transported to the welding station, and the permanent seal is then made by radio frequency, hot air or ultrasonic welding alongside or over that temporary line. This is entirely normal practice, and it is also the largest single source of variation in measured slippage, because the temporary stitch is a slippage event that happens before anyone measures anything.
The mechanism is that the basting stitches have already done the damage. If the temporary line is stitched at high thread tension through a coated, low-friction shell, the yarns are displaced at the moment of stitching, before any load is applied. The displacement is proportional to tension, to needle size and to how firmly the operator holds the fabric. By the time the bag reaches inspection, the seam geometry has already been rearranged by an amount that varies from operator to operator and from one end of a shift to the other.
- A basting stitch at high tension can pre-open the seam before the permanent weld is even made.
- Operator handling differs: pulling the fabric through the machine versus letting it feed freely changes how much the yarns shift.
- Needle size relative to yarn size decides whether the needle parts the yarns or punches through them, and punching through damages the structure.
- Removing the temporary stitching can itself drag yarns, particularly on smooth filament shells.
The fix is not to eliminate the temporary stitch, which is usually necessary, but to specify it. State the stitch type, the stitch density, the thread tension, the needle size and gauge, and require that the same settings be used at sampling and in bulk. Once the temporary operation is specified, its contribution becomes a constant rather than a variable, and the measured slippage becomes reproducible.
Why two bags from the same batch can differ by a factor of two
This is the single most useful diagnostic fact in the whole subject, and it is routinely misread as inconsistency in the fabric. When slippage measurements across a single production batch show a spread of two to one between the best and worst units, the cause is almost never the material. Fabric is produced on a loom under controlled tension and its slippage behaviour is relatively tight. Sewing is performed by people, and the variables people control are the ones that move the number.
| Source of variation | Typical effect on measured opening | Control that removes it |
|---|---|---|
| Thread tension at the sewing machine | Can double the opening between the loosest and tightest setting | Set and lock the tension; verify at the start of each shift |
| Operator feed technique | Factor of 1.5 to 2 between pulling and free feeding | Train to one method and audit it rather than leaving it to habit |
| Temporary basting stitch tension | Large; pre-displaces yarns before measurement | Specify the basting stitch as carefully as the permanent one |
| Seam allowance width variation | Directly proportional; a narrower allowance slips more | Use a guide or folder rather than a visual alignment |
| Fabric direction relative to load | Warp and weft differ substantially | Mark the direction on the pattern and test both |
| Fabric lot change | Usually modest if the construction is unchanged | Require a slippage re-test whenever the lot changes |
The practical conclusion is uncomfortable but valuable: if slippage results are scattered, do not start by changing the fabric. Start by watching the sewing station. Measure the thread tension on five machines and you will usually find they are not the same, because tension drifts and is rarely reset. Watch three operators and you will usually see three different feeding techniques. Both are free to fix, and both typically matter more than the material.
Statistical framing helps here, because slippage is a property with a distribution rather than a value. The approach described in our article on statistical process control in bag manufacturing applies directly: sample across the shift rather than from one operator, and treat the spread as the finding rather than the mean.
The new-bag trap: seams that look perfect until they are loaded
The largest risk in this subject is not that a bag slips; it is that slippage is invisible at every point where the buyer normally inspects. A bag is approved as a sample, inspected at packing, photographed for the listing and unboxed by the customer — empty, in every case. Empty, the panels carry no transverse load, the yarns sit where the loom and the needle left them, and the seam looks closed. The defect appears only when the bag is filled, carried, and cycled, which is precisely when the buyer has lost the ability to do anything about it.
This is why the acceptance test must be run on a loaded or cyclically loaded specimen rather than on a flat swatch taken off the roll. A fabric swatch tested unloaded tells you about the fabric. A seam taken from a filled bag that has been cycled tells you about the product. The difference between the two is the entire risk.
- Approve on a loaded sample, not an empty one. Fill the bag to rated capacity before inspecting the seams.
- Cycle before inspecting. Ten to twenty fill-and-empty cycles reproduces most of the permanent rearrangement that occurs in the first month.
- Inspect at the highest-load points, which are corners, strap roots and the base-to-body junction.
- Measure, do not eyeball. A one millimetre gap is invisible in a photograph and decisive in service.
The second bullet is the one buyers resist because it costs time at sampling, and it is the one that pays best. Most of the permanent yarn rearrangement happens in the first few load cycles and then largely stops, which means a short cycling protocol captures most of the lifetime movement. Twenty cycles at sampling is a fraction of a day and it converts an invisible risk into a measurable number.
Field correlation work supports this: the bags that come back with open seams are overwhelmingly bags whose failure was latent at dispatch rather than caused by abuse. The return-data view is set out in our article on warranty and return rate analysis, and the load-cycling protocols are described in our piece on load stress testing for straps and handles.
Seam allowance width: the cheapest anti-slip lever
If a seam is slipping, the first thing to change is not the fabric, the thread or the machine. It is the width of the seam allowance, and it is free. Slippage is the movement of yarns away from the stitch line, and the resistance to that movement is roughly proportional to the amount of fabric between the stitch line and the loaded edge. Double the allowance and you roughly double the fabric available to resist the load, at the cost of a few millimetres of material and a slightly bulkier seam.
The behaviour is not linear indefinitely, but in the range that matters for bag construction the effect is large and reliable. Moving from a six millimetre allowance to twelve millimetres is the single most cost-effective anti-slip measure available, and it costs grams of fabric rather than dollars. Programs that jump straight to a heavier base fabric or a reinforcement tape without first widening the allowance are paying for something they could have had for nothing.
- Six millimetres or less: adequate only for lightly loaded seams on high thread count plain weave.
- Ten to twelve millimetres: a sensible default for a waterproof bag body seam.
- Fifteen millimetres and above: justified at strap roots, base corners and any seam carrying a concentrated load.
- Use a folder or guide on the machine. An allowance that is specified but visually aligned will vary by several millimetres.
The last bullet is the one that decides whether the specification works. An allowance width written on a tech pack is only achieved if the machine is set up to produce it consistently, and visual alignment produces a distribution rather than a width. A folder attachment costs little and converts the allowance from a variable into a constant, which is exactly the same argument as the thread tension one above.
Interlining strips, reinforcement tape and basting aids
Where allowance width alone is not enough, three additions are available and they work by different mechanisms. A woven interlining strip sewn into the seam adds local thread count and local friction in the region where the yarns are being pushed, and it is the most direct fix. A reinforcement tape bonded over the stitch line constrains the yarns mechanically so they cannot move, and it doubles as a waterproofing measure. A basting tape or double-sided tape used to hold panels before welding removes the temporary stitch entirely and therefore removes its contribution to slippage.
| Measure | How it works | What it adds in cost | Best used where |
|---|---|---|---|
| Wider seam allowance | More fabric between the stitch line and the loaded edge resists yarn movement | Grams of fabric; effectively free | Every seam, as the first response |
| Woven interlining strip in the seam | Raises local thread count and friction at the stitch line | Small material and one operation | Slippery coated shells and low-count weaves |
| Reinforcement or seam tape over the stitch line | Mechanically constrains yarns and adds a waterproofing layer | Material plus a taping operation | Body seams where waterproofing is already required |
| Basting tape instead of temporary stitching | Removes the pre-displacement caused by the basting needle | Tape cost, offset by removing an operation | Welded constructions with a temporary tacking step |
| Heavier or higher-count base fabric | Raises the intrinsic resistance of the cloth | Material cost; the most expensive option | Only after the four cheaper measures are exhausted |
The third row is worth flagging as the best value in the table for a waterproof bag specifically, because the tape is usually being applied anyway for waterproofing. Specifying that it be applied wide enough and bonded well enough to constrain the yarns as well as to seal the seam converts a cost you are already paying into a solution to a problem you did not know you had. The routes are covered in our guide to seam taping and sealing methods.
The fifth row is included for completeness and should genuinely be last. Changing the base fabric changes weight, hand, cost, weldability and print behaviour all at once, and it is the most disruptive response to a problem that is usually solved by twelve millimetres of allowance. Our article on woven versus knit base fabrics covers how construction choice sets the intrinsic slippage behaviour.
Stitch density, thread tension and needle choice
Three machine settings decide how much a seam slips, and they are almost never on the tech pack despite being free to specify. Stitch density, usually expressed as stitches per inch or per three centimetres, sets how many discrete load points are distributed along the seam. Thread tension sets how hard each stitch pinches the yarns and how much the fabric is drawn during sewing. Needle size sets whether the needle parts the yarns or cuts through them.
- Higher stitch density distributes the load across more points and generally reduces opening, but above a threshold it perforates the fabric so densely that it weakens the seam and, on a coated shell, damages the waterproof layer.
- Lower thread tension reduces the yarn displacement introduced during sewing itself, and usually reduces measured slippage materially.
- A needle that is too large punches through yarns rather than passing between them, permanently damaging the structure the seam depends on.
- A needle that is too small deflects, produces inconsistent stitch formation, and can generate heat that damages thermoplastic yarns.
The first bullet contains the important trade-off and it is worth stating as a number rather than a principle. Going from six to ten stitches per inch typically improves slippage meaningfully. Going from ten to sixteen often does very little for slippage while measurably reducing seam strength and increasing the number of perforations through the coating. There is a plateau, and past it you are buying damage rather than performance.
On coated and laminated shells the perforation issue compounds, because every needle hole is a potential leak path and a coated fabric has no ability to close back around the thread. This is the main reason welded construction is preferred for waterproof work, and the trade-offs are laid out in our comparison of stitched, welded and bonded construction.
Slippage and seam strength are different tests that rank fabrics differently
The two tests are routinely confused and they answer incompatible questions. Seam strength asks how much load destroys the seam, and it is dominated by thread strength, stitch density and the tensile properties of the fabric. Slippage asks how far the seam opens under a service load, and it is dominated by inter-yarn friction, thread count and weave construction. A fabric can be first quartile on one and last quartile on the other, and the most common version of this is a strong, smooth, filament, twill-weave shell that wins every strength test and slips badly.
The specification implication is simple and often ignored: both numbers belong on the tech pack, with the method named for each. Requesting only seam strength is requesting the answer to a question the product will never face, while omitting the answer to the question it faces every day.
| Test | Question it answers | Dominant variables | Use as an acceptance criterion? |
|---|---|---|---|
| Seam strength | How much load destroys the seam | Thread strength, stitch density, fabric tensile | Yes, but it does not predict opening |
| EN ISO 13936 Part 1 | Force needed to open a seam to a set gap | Same as slippage, reported in newtons | Weak; hard to turn into a product rule |
| EN ISO 13936 Part 2 | How far the seam opens under a set load | Inter-yarn friction, thread count, weave | Yes; this is the useful one |
| Loaded and cycled product test | What actually happens to the finished bag | Everything, including operator variation | Yes; the only one that captures the real failure |
| Seam strength after conditioning | How the seam behaves after ageing | Plus coating and thread degradation | Yes, for long-life programmes |
The fourth row deserves to be the primary acceptance method for any programme where slippage is a live risk, because it is the only one that includes the operator contribution. Laboratory methods on flat specimens remove exactly the variable that produces most field failures. The full set of seam verification routes is described in our article on waterproof seam integrity testing methods.
Acceptance criteria in millimetres: writing a number you can defend
An acceptance criterion for slippage has to be a number in millimetres, measured under a stated load, on a stated seam construction, after a stated conditioning or cycling protocol. Anything else becomes an argument. The values below are working defaults for a fixed-load method on a body seam; they should be confirmed against the actual construction and duty rather than copied, but they give a starting point that is far better than none.
| Duty band | Load used in the test | Maximum acceptable opening | What failing it means in service |
|---|---|---|---|
| Light duty: pouches, organisers, liners | Low, around 60 newtons | Up to 4 mm | Cosmetic opening only; rarely functional |
| General duty: totes, daypacks, dry bags | Moderate, around 120 newtons | Up to 3 mm | Visible smile at corners after a season |
| Heavy duty: expedition, tool, utility | High, around 180 newtons | Up to 2 mm | Gap exposes the seal and leaking follows |
| Structural: strap roots, handle attachments | Highest, plus cyclic loading | Up to 1.5 mm | Progressive opening and eventual detachment |
| Any seam over a welded seal | Match the duty band above | Tighter than the fabric criterion | The seal is now spanning a gap it was not designed for |
The last row is the one that most often gets missed, and it is where slippage converts into a warranty claim. A welded or taped seal is designed to be supported by the fabric on both sides. Once the fabric has moved a couple of millimetres away from the stitch line, the seal is bridging a gap and carrying the full hydrostatic load by itself. That is the point at which a slippage problem becomes a leaking problem, and it happens with no visible damage to the seal.
One practical note on measurement: measure the opening perpendicular to the seam at its widest point, on a specimen that has been relaxed after unloading. A measurement taken while the load is still applied includes elastic recovery that will partly close, and it will flatter the result by a millimetre or more.
Where slippage turns into leaking, and how to catch it before shipment
The path from slippage to a wet interior is short and predictable. Yarns move, a gap opens, the seal behind the seam is left unsupported, water pressure at that point is applied to the tape or weld alone, and the seal either stretches into the gap or debonds at its edge. None of this requires a defective seal. A perfectly applied weld will fail this way if the fabric beside it moves far enough.
- Inspect a filled and cycled sample, never an empty one, and measure the opening at the highest-load points.
- Weld or tape a seam, then confirm that the fabric either side of the seal is still constrained by the stitch line.
- Where a weld runs alongside a stitched seam, keep the stitch line close enough to the weld to share the load.
- Re-test slippage whenever the fabric lot, the coating or the sewing subcontractor changes.
- Record the machine settings at sampling and require them in bulk. Most drift is in the settings, not the material.
The fourth bullet is the control that catches the common real-world failure, which is a mid-programme fabric substitution presented as equivalent. Constructions that look identical on a specification sheet can differ substantially in thread count and yarn character, and a substitute that passes tensile and tear testing can slip twice as much. A single slippage re-test on the new lot costs almost nothing and catches it.
The inspection framework this belongs in is set out in our guide to waterproof bag quality control, and the pre-shipment view is in our pre-shipment inspection checklist. The defect taxonomy that includes seam opening is catalogued in our article on common waterproof bag defects.
Independent laboratories including SATRA run EN ISO 13936 routinely and can also run a loaded product protocol if you specify the loading and cycling. The cost is small relative to the value of discovering the problem at sampling rather than at the returns desk.
The seam specification: eleven lines that stop seams opening after sale
Everything above compresses into eleven lines, and the striking thing about them is how few cost money. Most are settings and sequences that are currently left to habit, which is why slippage behaves like a random defect when it is actually a specified-outcome problem waiting to be specified.
- Seam allowance width in millimetres, achieved with a folder or guide rather than visual alignment.
- Stitch density in stitches per inch or per three centimetres, with a tolerance, set below the perforation plateau.
- Thread tension, set and locked, verified at the start of each shift rather than assumed.
- Needle size and type, matched to the yarn so the needle parts rather than cuts.
- Fabric direction: state warp and weft orientation relative to the load on every pattern piece.
- Temporary stitching or basting tape: specify the method, settings and tension, or eliminate the step with tape.
- Reinforcement: state whether an interlining strip or reinforcement tape is used and how wide it is.
- Test method: EN ISO 13936 Part 2, with the load in newtons and the direction stated.
- Acceptance criterion: maximum opening in millimetres, measured after relaxation, by duty band.
- Product-level protocol: fill, cycle a stated number of times, then measure at the highest-load points.
- Re-test triggers: any change of fabric lot, coating, sewing settings or subcontractor requires a fresh slippage test.
The ninth and tenth lines are the pair that convert this from a laboratory exercise into a control that predicts the field, and they are the two most often omitted. A millimetre limit on a flat specimen tells you about the fabric; a millimetre limit on a cycled, filled bag tells you about the product you are about to ship.
The eleventh line is the one that protects the programme over time. Slippage is highly sensitive to small changes in fabric construction, and those changes are exactly the kind that get made quietly during a reorder. Making the re-test a contractual trigger costs nothing and closes the most common route by which a good specification degrades.
If you want a seam construction developed against a specific duty, send the fabric specification, the load case and the capacity, and the allowance, stitch and reinforcement combination can be validated against those rather than inherited from a previous style. You can see how a programme moves from first enquiry through sampling into bulk production, and every style we produce starts at 500 pieces minimum, with samples in 6–10 working days and bulk in 35–50 days, quoted FOB Xiamen.
Frequently Asked Questions
Q1. What is seam slippage on a waterproof bag?
The sideways movement of yarns within the woven fabric away from the stitch line under load. The thread does not break and the seam does not burst; a gap simply opens alongside the stitching, permanently.
Q2. Why does a coated fabric slip more than an uncoated one?
Because coating reduces the inter-yarn friction that holds the weave geometry in place. The shell feels more substantial and resists slippage less, which is counter-intuitive and routinely missed at material selection.
Q3. What is EN ISO 13936?
The international method for measuring the resistance of yarns to slippage at a seam in woven fabrics. Part 1 reports the force to reach a fixed opening; Part 2 reports the opening in millimetres under a fixed load.
Q4. Which part of EN ISO 13936 should I specify?
Part 2. It gives an opening in millimetres under a defined load, which converts directly into an acceptance criterion. Part 1 gives a force that is hard to turn into a product rule.
Q5. How much seam opening is acceptable?
Working defaults are around 4 mm for light duty, 3 mm for general duty, 2 mm for heavy duty and 1.5 mm at structural points such as strap roots. Confirm against your own construction rather than copying.
Q6. Why do seams from the same batch slip by different amounts?
Usually thread tension differences between machines and different feed techniques between operators. The material is comparatively consistent; the sewing process is not, and it can produce a twofold spread.
Q7. What is the cheapest way to reduce slippage?
Widen the seam allowance. Moving from six to twelve millimetres roughly doubles the fabric resisting the load and costs grams of material. It should always be the first response.
Q8. Does a wider seam allowance really help?
Yes, and it is the most cost-effective measure available. The resistance to yarn movement is roughly proportional to the fabric between the stitch line and the loaded edge.
Q9. Does higher stitch density reduce slippage?
Up to a plateau, yes. Going from six to ten stitches per inch helps; going from ten to sixteen does little for slippage while reducing seam strength and adding perforations through the coating.
Q10. Why does the problem only appear after the bag is used?
Because slippage needs transverse load to occur. Every inspection point, from sampling to unboxing, happens with the bag empty, so the yarns sit where they were left and the seam looks closed.
Q11. How can I catch slippage before shipment?
Fill the sample to rated capacity, cycle it ten to twenty times, then measure the opening at the highest-load points. Most permanent rearrangement happens in the first few cycles.
Q12. Can slippage cause a leak?
Yes, and that is the usual route. Once the fabric moves away from the stitch line, the weld or tape behind the seam is left spanning a gap and carries the full water load alone, even though the seal itself is sound.
Q13. Is seam slippage the same as seam strength?
No. Seam strength measures the load that destroys the seam and is dominated by thread and stitch density. Slippage measures how far the seam opens under service load and is dominated by inter-yarn friction and weave.
Q14. Should I use basting tape instead of temporary stitching?
Where the temporary stitch is only there to hold panels for welding, yes. It removes the yarn displacement that the basting needle introduces before the permanent seal is made.
Q15. Does a reinforcement tape help with slippage?
Yes, and it is excellent value because the tape is usually being applied anyway for waterproofing. Specified wide enough and bonded properly, it mechanically constrains the yarns as well as sealing the seam.
Q16. When should I change the fabric to fix slippage?
Last, after allowance width, stitch settings, interlining and reinforcement have all been tried. A fabric change alters weight, hand, cost, weldability and print behaviour at the same time.
Q17. When should slippage be re-tested?
Whenever the fabric lot, the coating, the sewing settings or the subcontractor changes. Constructions that look identical on paper can differ substantially in thread count and yarn character.
People Also Ask
What is seam slippage on a bag?
Yarns in the woven fabric sliding sideways away from the stitch line under load. The thread stays intact and a gap opens beside it, usually permanently.
Why do coated waterproof fabrics slip more?
Because the coating lowers inter-yarn friction. The fabric feels stiffer and more premium while its weave geometry is actually less able to hold shape.
How is seam slippage measured?
By EN ISO 13936. Part 1 reports force to a fixed opening; Part 2 reports the opening in millimetres under a fixed load, which is the useful one for specifications.
How much seam opening is too much?
Around 3 mm for general duty and 2 mm for heavy duty under the test load. Anything wider at a structural point usually leads to leaking.
Why does my bag seam open only after loading?
Because slippage requires transverse load. Every inspection happens with the bag empty, so the defect stays invisible until the customer fills it.
What is the cheapest fix for seam slippage?
Widen the seam allowance, typically from six to twelve millimetres. It costs grams of fabric and works better than most material upgrades.